Stacie the Baker
This past weekend was a weekend of double takes. First, I made chocolate cupcakes for the 29th birthday of this blog's founder and eponymous star, Sarah... I followed up Act 1 with an encore of decadent chocolate on chocolate cake for my Bible study. I know, I'm not really exercising my range here. But I don't really care, it's chocolate.

This double duty was matched by the fact that I had Pad Thai not once, but TWICE this weekend. (anyone jealous?) However, I'd like to quote the iconic old Hollywood actress Mae West who once said, "Too much of a good thing can be wonderful!" Amen sista. And this weekend was definitely wonderful. Particularly the chocolate cupcakes (IMO)...

This cupcake recipe is from the latest issue of Cook's Illustrated magazine (which, as many of you know, serves as my culinary cornerstone, nay, my culinary Bible... sorry Jesus). It's touted by CI as being the "Ultimate Chocolate Cupcake," and needless to say, such bold sweeping claims must be tested and proven in my kitchen before they are to be believed... and I'm happy to announce that this recipe lived up to its name... frickin' ULTIMATE!!


Let's start with the Ganache Filling:

2 ounces of bittersweet chocolate, chopped fine
1/4 heavy cream
1 TBSP confectioners' sug

1. Place chocolate, cream and sugar in medium microwave safe bowl, and heat on high for 20-30 seconds... enough to melt the mixture. Whisk until smooth and put in the fridge for no more than 30 minutes... enough to firm it up.

Chocolate Cupcakes:
3 oz of bittersweet chocolate, chopped fine
1/3 cup of cocoa powder (I refuse to use dutch-processed, since they fluff it with all that alkali and make it taste nasty)
3/4 cup of hot coffee
3/4 cup bread flour
3/4 granulated sugar
1/2 tsp salt
1/2 tsp baking SODA
6 TBSP of veg oil (I subbed it with coconut oil, because it's so much healthier and tastier! made a difference!)
2 large eggs
2 tsp of white vinegar
1 tsp vanilla extract

1. Place chocolate and cocoa in medium bowl, pour the hot coffee over the mixture and whisk until smooth. Set in fridge and let it cool completely... 20 mins. Whisk flour, sugar, salt, and baking soda in med. bowl and set aside.

2. Whisk oil, eggs, vinegar, and vanilla into cooled cocoa-chocolate mixture until nice and smooth. Add the flour mixture and whisk until smooth.
3. Divide batter evenly among muffin pans... only makes 12! Bummer. Then place one slightly round teaspoon on top of each cupcake... don't worry about pressing it in (like I did), because it will sink! Promise! :-)
4. Bake at 350 degrees for 17-19 minutes until cupcakes are set and are slightly firm to the touch. Let the cupcakes cool for 1 hr (take them out of the muffin tin after about 10 minutes).
.
Swiss Buttercream Chocolate Frosting:
1/3 cup granulated sugar
2 large egg whites
Pinch of salt
12 tablespoons of unsalted butter, softened and cut into 1 tbsp pieces
6 oz of bittersweet chocolate (melted and cooled to 85-100 degrees)
1/2 tsp vanilla extract
.
1. Combine sugar, egg whites and salt in double boiler... allow the water in the double boiler to be simmering. Whisking gently but constantly, hear mixture until slightly thickened, foamy and 150 degrees... 2-3 minutes... give or take.
2. Place ingredients into stand mixer fitted with whisk attachment. Beat mixture on medium speed until consistency of shaving cream... don't overwhip! add butter 1 piece at a time until it's smooth and creamy. Frosting make look curdled after half of butter as been added. It will smooth out though. Once all butter is added, add cooled chocolate and vanilla and mix until combined. Increase speed to med-high and beat until light and fluffy... about 30 seconds... Voila!
3. Now it's time to frost those puppies!! Place about 2-3 tablespoons of icing on each cupcake. Using a non-serated knife or metal icing knife thing (technical term, but I need to get one of those!!!), push out frosting from center towards the edge of the cupcake, then smooth out the edges of the cupcake! dazzling darling... simply mauvelous! You can grate some chocolate, make some pretty curls or put Sprinkles on top... but they are ready to be served!
.
Below are examples of the cupcake... this actually a picture of one of my rejects - notice the weird hole (this was the last one to be eaten... which was promptly devoured as I wrote this post!)...


Stacie the Baker
So, for my second post, I promised myself I would do something a little more challenging than my pitiful caramel corn recipe. So, I ventured into the slightly intimidating realm of layered cakes.... On the cover of the most recent issue of The Best of America's Test Kitchen (2010), there is a glorious vision of chocolatey decadence one wouldn't think is humanly possible.... A flourless chocolate cake topped with a silky chocolate mousse then topped with a white chocolate whipped concoction THEN topped with chocolate curls. Behold this glorious vision!


So, last night, my husband and I had invited some friends over for a Bible Study. I figured I would at least attempt to be hospitable by trying to make something for all of us to eat (putting out cheetos like in college seems no longer adequate, I guess unless britney spears was my friend). However, there was like a 60% chance that my creation would have looked more like this...


and less like the angelic vision above. This certainly wouldn't have surprised me, given my penchant for general mediocrity in the kitchen (and in life, really). Alright enough of my grandstanding and self-flagellation, onto the recipe and results.


Alright, get ready, it took me roughly 2 hours to make this dessert (with a few pee breaks, don't worry I washed my hands).


Ingredients
Base Layer
6 TBSP of unsalted butter
7 ounces of bittersweet chocolate (CI says Ghiradelli is the way to go - if you're willing to take out a second mortgage on your house to pay for fancy chocolate then go for it, otherwise Baker's is just fine)
3/4 tsp instant espresso powder
1&1/2 tsp of vanilla
4 large eggs (separate those suckers)
pinch salt [sic] Pinch OF salt, Cook's Illustrated needs to get some copy editors stat
1/3 cup packed brown sugar

Middle Layer
2 TBSP of cocoa powder (Dutch-processed or otherwise, I personally hate Dutch processed CP)
5 TBSP hot water
7 oz of Bittersweet chocolate (chop it up!, anyone else watch Dave Chappelle?)
1&1/2 cups heavy cream
1 TBSP sugar
1/8 tsp of salt


Top Layer
3/4 tsp gelatin
1 TBSP water
6 oz of white chocolate (CHOP IT FINE!)
1&1/2 cups of heavy cream
chocolate shavings.... use a soft chocolate like hershey's bar or something

Alright people its go time... 1. Oven 325 degrees. grease a 9 inch springform pan. Melt butter, chopped up chocolate and espresso powder in double boiler until smooth. remove from heat and let sit 5-6 min. then, whisk in vanilla and egg YOLKS!


2. In your mixer, WHISK (at medium speed) egg whites and salt until frothy (30ish sec). Add 1/2 of brown sugar, beat for 15 seconds, then add remaining and beat on high until soft peaks form. using a whisk, fold 1/3 of foam into chocolate mixture. Fold in the remaining with spatula until no streaks remain. Put that puppy in the oven and bake for 13-18 minutes... until center has set. I baked my for 14 minutes in my gas stove. Let the cake cool for at least 1 hour.

Alright, tier 2! Combine cocoa powder and hot water. set aside. Melt chocolate in double boiler. once smooth remove from heat and let sit for 5-6 minutes. Alright, time to clean out the stand mixer, because you need to whisk together the cream, sugar, and salt until it begins to thicken. Increase to high and whip til soft peaks form. Whisk in cocoa powder mixture into chocolate then fold 1/3 of whipped cream into the chocolate (use spatula). then fold in the remaining until no streaks remain. Smooth out the top of the mousse and refrigerate at least 15 minutes... I personally say you should refridgerate for 30 minutes.


Home stretch... final layer.


Sprinkle gelatin over water in small cup. set aside for 5 minutes at least. Place white choc in medium bowl. bring 1/2 cup of cream to a simmer in a small saucepan over medium high heat. remove from heat and then dump gelatin mixture into cream and stir it all up. then pour the cream/gelatin mixture over the white chocolate and stir that all up (until no lumps, my lumps, my lovely lady lumps, remain). Let that cool for about 8 minutes.

Alright clean out that stand mixer again, because you need to whisk the remaining cream on high. Once you get soft peaks, fold 1/3 of mixture into chocolate. then fold in the rest until no streaks remain. spoon over bittersweet layer and let the cake sit in the fridge for at least 3 hours. Garnish this with delicious chocolate curls... or in my case, chocolate flecks.

Voila! My latest creation. (My springform pan was too big, so my layers aren't as big as the picture above, but it still tasted delicious and everyone liked it. Hurray for my ego!) Sarah - a slice of this will be waiting for you on your doorstep tonight... along with Lars and the Real Girl. Thanks for letting me borrow... official review: quirky, weird, likeable.

Shelly
Okay. . . I'll admit it. I don't cook as much as I should or would like to. . . but right now, at this exact moment, I actually have an excuse. My new kitchen is an absolute wreck (see image at left). This photo is actually from moving day one. I can not tell you how much more disastrous it looks at this point, after a week or so of moving things in and trying to find a happy home for everything in a kitchen which has surprisingly much less drawer space than the old apartment did.

Also of note, I am now having to become accustomed to cooking on a dreaded ELECTRIC stove. Who ever thought of electric stoves? Can anything really replace an open flame underneath your pot?

That being said, I have made my first attempt at cooking something in the house other than microwave lasagna or ham sandwiches. It was, of course, a classic. . . Sauce Piquante. There are, sadly, no pictures of the food - because who knows where the camera is now? It's probably buried under the lawnmower in the middle of the living room floor. . .

Anyhow, here's my recipe for Sauce Piquante, passed down from mom. She adds sausage to hers now, but I left that out since I am no huge fan of sausage. I've seen other recipes that are much more complicated. . . but why bother when this is so good and so simple?

Sauce Piquante
2 lbs. beef stew meat
2 cans Rotel
1/2 onion, diced
1 T. Vegetable oil
1 small (8 oz? 6 oz?) can of tomato sauce

Heat the vegetable oil (or butter if you've stupidly left the oil at the old apartment) and toss in the onion. Sauté the onion until it starts to wilt. . . turns translucent. That's it. Then, toss in the stew meat, and I always sprinkle some Tony Chachere's on it, but not too much, otherwise it'll all be too salty. Brown the meat, then lower the fire (or pretend fire if you have an electric stove) to low. Add the Rotel, and tomato sauce and mix well. Cover the pot and let it simmer for about two hours. Spoon over rice.

This is one of my comfort foods, and always reminds me of home. It's also one of the few dishes that my dad cooked when I was growing up. . . Sauce Piquante, roast, brisket, and bbq. I guess it has enough meat in it to count as man food.
Sarah Ferstel
When I was studying abroad, I remember my Italian flatmate's total confusion when I brought sweet potatoes home. My Chinese flatmate, on the other hand, was as excited as I was to have them. We threw them in the oven and then ate them with a spoon right out of the skins. Simple, delicious, and very nutritious.

Down here in Louisiana, and probably in other parts of the south, you can often find sweet potato casserole with marshmallows on Thanksgiving and holiday tables. I hunted (i.e. Googled) for a cupcake equivalent, and what do you know - it exists!

The cake part was easy enough, but roasting little mounds of mini-marshmallows let me express pryomaniacal desires I didn't know existed. Thank goodness my step-mother isn't bothered if you start marshmallow fires in her oven.

Whoops!


The second batch came out just right, but they were a pain to transfer to the cupcakes.

Cute, hunh?


The overall taste of the cupcake with the "frosting" was okay, but nothing really special. I prefer the casserole or sweet potato pie.

My nephews really liked them, but I think they'd eat brussell sprouts if we put marshmallows on top.

What did I learn from all this?

1) Marshmallows go from lightly toasted to flaming mounds of madness in about 2 seconds.

2) Young boys like sugary treats.

3) Not every dessert dish should be cupcake'd.


Sarah Ferstel
Happy New Years, everyone!

I'll post all about my holiday food adventures in separate posts after this one, but I want to use this entry to brag about my presents. Yes, I realize it's in poor taste and my mother always pooh-poohs materialistic bragging, but too bad, Mama! I'm an adult now which means I can eat dessert before dinner (one of my consistent childhood plans for adulthood), and I can show off my presents.

In no particular order, here are my kitchen-y/foodie prezzies:

1)


The book My life in France by Julia Child with Alex Prud'homme - I'm halfway through this delightful little book which celebrates France and its cuisine all through Julia's voice, which is always filled with joie de vivre. It's a really fun read.

2)
Mastering the Art of French Cooking, Vol. 1

The cookbook Mastering the Art of French Cooking by Mme. Child and friends - I know it is surprising that I don't already own this cookbook, but I've always been more a fan of Italian cooking than French. One of my resolutions for this year is to acquaint myself with many of the recipes and techniques in this book. Skimming through the book, I noticed a lot of recipes call for butter, which is always a plus!

3)
Silicone Rainbow Whisks
A silicone rainbow whisk by Kuhn Rikon - The colors may seem tacky to some, but they remind me of Lisa Frank and gay pride - so, whee!

4)


Another cookbook Cooking up a Storm: Recipes Lost and Found from the Times-Picayune of New Orleans - This is a collection of lost recipes sent in from Louisiana residents and chefs after hurricane Katrina (and probably Rita, too). There's a really nice mix of recipes in here and I like that some are family recipes, while others are restaurant favorites. Each recipe comes with a little story, which, as a history-lovin' kind of nerd, I love.

* Please ignore some of the bitchy comments made by food snobs on the Amazon site about this book. Some people's mamas didn't raise them right.

5)

HVT4242

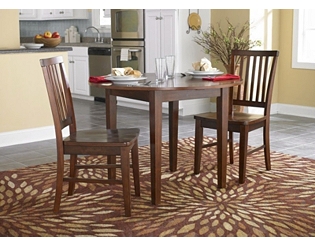
I bought a proper dining room table with matching chairs! No more eating off my childhood desk/diaper table for me. It's small with drop down leaves and two chairs, which is perfect for the dry wall, echo box I call home. Precious, ain't it?

Okay, now it's your turn to show off. What did Santa/Hanukkah Harry/Kwanzaa Kimmy/Atheistic Al bring you?

Stacie the Baker
Hello world!

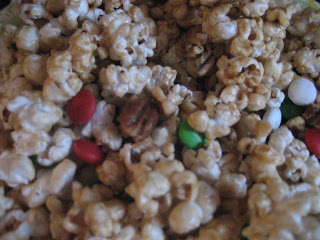
It is with great joy and honor that I present to you my very first post on Sarah, Shelly and Brett's illustrious cooking blog. I enter this format with much trepidation, so please do not pulverize me in the comments section (or I'm afraid my ego will never let me come back). However, needless to say, I'm pleased to bring you a scrumptuous, little recipe for caramel corn!

To be totally honest, I'm kind of bummed this is my first post. I was hoping for something a little more culinarily challenging, but when you've procrastinated past the point of apologies, this is what you're reduced to. So, CARAMEL CORN it is!


Ingredients
12 cups of popped corn
1 cup of roasted pecans
1 cup of M&Ms (optional)
1 stick of unsalted butter
1 cup of packed light brown sugar
1/4 cup of light corn syrup
1/2 tsp. salt
1/2 tsp. baking soda
1 large brown paper grocery bag


I'd like to preface the instructions by stating you can use whatever kind of popcorn you'd like. Precooked popcorn, microwave popcorn, stovetop cooked popcorn. I personally cooked my corn on the stovetop in oil (cheapest!).

Instructions
1) Place popcorn and roasted nuts in brown paper grocery bag. Shake it up a little to combine (If you'd like, you can add pretzels too!)

2) Melt butter in microwave for approximately 1 minute. Add brown sugar, corn syrup, and salt and microwave for 2 minutes. Stir the mixture for about 30 seconds to a minute, and then placed back in the microwave for 2 more minutes. The mixture will bubble and boil. Do not be alarmed!

3) Add baking soda to sugar mixture. It was get foamy, but once it starts to do this... carefully pour it on top of the caramel corn. Fold over the paper bag and start to shake!

4) Throw it back in the microwave for another minute. Take it out and shake again. Then another minute in the microwave. Open the bag, add the M&Ms and shake for 30 seconds one last time!


Voila! Just spread it over a cookie sheet and let it get crunchy! You can break it up and start munching on it within 5 minutes.

Here's an idea: For an inexpensive Christmas gift, I put mine in Christmas-themed Chinese take-out boxes. Good for coworkers or neighbors!


Either way, this is such an easy snack to make... I hope that you enjoy!
Shelly
Okay. . . maybe I'm the only one here, but I'm sort of wishing that I had some of the recipes from last weekend's party. . . so if you're reading this, you should post your party food recipe. In the meantime, here is the recipe for the dish that I brought. I'm too lazy to get up and retrieve the recipe for the Chocolate Pecan Pie, but if somebody wants it, let me know, and I'll go dig it out. I have to say that I did like this recipe, but it seemed like a lot of work for what it was. It's a shame frozen pie shells don't come in a mini size. . . Then again, maybe I should not attempt to do this sort of thing after working a late shift at the library.

Leek and Onion Tartlets

2 T. butter
1 onion, thinly sliced
1/2 tsp. dried thyme (I didn't have thyme, so I used Herbes de Provence)
1 pound leeks, thinly sliced
2 ounces Gruyère or Emmenthal cheese, grated (I live in Podunk, America, so I had to use Parmesan)
3 eggs
1 1/4 c. light cream
pinch of freshly grated nutmeg
salt and ground black pepper

For the pastry
1 1/3 c. all-purpose flour
6 T. cold butter
1 egg yolk
2-3 T. cold water
1/2 tsp. salt

1. To make the pastry, sift the flour into a bowl and add the butter. Using your fingertips, rub the butter into the flour until it resembles fine bread crumbs. Make a well in the center of the mixture.
2. Beat together the egg yolk, water and salt, pour into the well and combine the flour and liquid until it begins to stick together. Form into a ball. Wrap and chill for 30 minutes.
3. Butter six 4- inch tartlet pans. On a lightly floured surface, roll out the dough until 1/8 inch thick (which I found to be an IMPOSSIBLE task), then using a 5 inch cutter, cut as many rounds as possible. Gently ease the rounds into the pans, pressing the pastry firmly into the bottom and sides. Re-roll the trimmings and line the remaining pans. Prick teh bottoms all over and chil in the refrigerator for 30 minutes.
4. Preheat the oven to 375. Line the pastry crusts with foil and fill with baking beans. Place on a baking sheet and bake for 6-8 minutes, until golden at the edges. Remove the foil and beans and bake for another 2 minutes, until the bottoms appear dry. Transfer to a wire rack to cool. Reduce the oven temp to 350.
5. In a large frying pan, melt the butter over medium heat, then add the onion and thyme and cook for 3-5 minutes, until the onion is just softened, stirring frequently. Add the thinly sliced leeks and cook for 10-12 minutes, until they are soft and tender, stirring occasionally. Divide the leek mixture among the pastry crusts and sprinkle each with cheese, dividing it evenly.
6. In a medium bowl, beat the eggs, cream, nutmeg and salt and pepper. Place the pastry crusts on a baking sheet and pour in th egg mixture. Bake for 15-20 minutes, until set and golden. Transfer the tartlets to a wire rack to cool.