Stacie the Baker
Hello world!

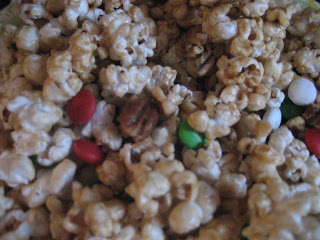
It is with great joy and honor that I present to you my very first post on Sarah, Shelly and Brett's illustrious cooking blog. I enter this format with much trepidation, so please do not pulverize me in the comments section (or I'm afraid my ego will never let me come back). However, needless to say, I'm pleased to bring you a scrumptuous, little recipe for caramel corn!

To be totally honest, I'm kind of bummed this is my first post. I was hoping for something a little more culinarily challenging, but when you've procrastinated past the point of apologies, this is what you're reduced to. So, CARAMEL CORN it is!


Ingredients
12 cups of popped corn
1 cup of roasted pecans
1 cup of M&Ms (optional)
1 stick of unsalted butter
1 cup of packed light brown sugar
1/4 cup of light corn syrup
1/2 tsp. salt
1/2 tsp. baking soda
1 large brown paper grocery bag


I'd like to preface the instructions by stating you can use whatever kind of popcorn you'd like. Precooked popcorn, microwave popcorn, stovetop cooked popcorn. I personally cooked my corn on the stovetop in oil (cheapest!).

Instructions
1) Place popcorn and roasted nuts in brown paper grocery bag. Shake it up a little to combine (If you'd like, you can add pretzels too!)

2) Melt butter in microwave for approximately 1 minute. Add brown sugar, corn syrup, and salt and microwave for 2 minutes. Stir the mixture for about 30 seconds to a minute, and then placed back in the microwave for 2 more minutes. The mixture will bubble and boil. Do not be alarmed!

3) Add baking soda to sugar mixture. It was get foamy, but once it starts to do this... carefully pour it on top of the caramel corn. Fold over the paper bag and start to shake!

4) Throw it back in the microwave for another minute. Take it out and shake again. Then another minute in the microwave. Open the bag, add the M&Ms and shake for 30 seconds one last time!


Voila! Just spread it over a cookie sheet and let it get crunchy! You can break it up and start munching on it within 5 minutes.

Here's an idea: For an inexpensive Christmas gift, I put mine in Christmas-themed Chinese take-out boxes. Good for coworkers or neighbors!


Either way, this is such an easy snack to make... I hope that you enjoy!
Shelly
Okay. . . maybe I'm the only one here, but I'm sort of wishing that I had some of the recipes from last weekend's party. . . so if you're reading this, you should post your party food recipe. In the meantime, here is the recipe for the dish that I brought. I'm too lazy to get up and retrieve the recipe for the Chocolate Pecan Pie, but if somebody wants it, let me know, and I'll go dig it out. I have to say that I did like this recipe, but it seemed like a lot of work for what it was. It's a shame frozen pie shells don't come in a mini size. . . Then again, maybe I should not attempt to do this sort of thing after working a late shift at the library.

Leek and Onion Tartlets

2 T. butter
1 onion, thinly sliced
1/2 tsp. dried thyme (I didn't have thyme, so I used Herbes de Provence)
1 pound leeks, thinly sliced
2 ounces Gruyère or Emmenthal cheese, grated (I live in Podunk, America, so I had to use Parmesan)
3 eggs
1 1/4 c. light cream
pinch of freshly grated nutmeg
salt and ground black pepper

For the pastry
1 1/3 c. all-purpose flour
6 T. cold butter
1 egg yolk
2-3 T. cold water
1/2 tsp. salt

1. To make the pastry, sift the flour into a bowl and add the butter. Using your fingertips, rub the butter into the flour until it resembles fine bread crumbs. Make a well in the center of the mixture.
2. Beat together the egg yolk, water and salt, pour into the well and combine the flour and liquid until it begins to stick together. Form into a ball. Wrap and chill for 30 minutes.
3. Butter six 4- inch tartlet pans. On a lightly floured surface, roll out the dough until 1/8 inch thick (which I found to be an IMPOSSIBLE task), then using a 5 inch cutter, cut as many rounds as possible. Gently ease the rounds into the pans, pressing the pastry firmly into the bottom and sides. Re-roll the trimmings and line the remaining pans. Prick teh bottoms all over and chil in the refrigerator for 30 minutes.
4. Preheat the oven to 375. Line the pastry crusts with foil and fill with baking beans. Place on a baking sheet and bake for 6-8 minutes, until golden at the edges. Remove the foil and beans and bake for another 2 minutes, until the bottoms appear dry. Transfer to a wire rack to cool. Reduce the oven temp to 350.
5. In a large frying pan, melt the butter over medium heat, then add the onion and thyme and cook for 3-5 minutes, until the onion is just softened, stirring frequently. Add the thinly sliced leeks and cook for 10-12 minutes, until they are soft and tender, stirring occasionally. Divide the leek mixture among the pastry crusts and sprinkle each with cheese, dividing it evenly.
6. In a medium bowl, beat the eggs, cream, nutmeg and salt and pepper. Place the pastry crusts on a baking sheet and pour in th egg mixture. Bake for 15-20 minutes, until set and golden. Transfer the tartlets to a wire rack to cool.
Shelly
If I've never mentioned it, the best recipes are never my own. Again, this one comes from my Mom-mom. It's one that she's cooked for years, and, for some reason, she thinks that Jared's the only one who likes them. . . So, she makes extra for him (spoiled brat) but not for the rest of us. So, this year, I decided to make a batch for myself. I'm sure that I'll bring most of them to the Cookie Swap at the library. It's going to be next Saturday at 10:30 if you want something to do that morning. We're also making beeswax candles. Just bring some cookies, your recipe, and a sense of fun! Anyhow, when we were eating Thanksgiving dinner, I asked Mom-mom for this recipe. She mailed it to me this week, and I noticed (I guess because it was on her ice cream recipe too) that she always writes "Good Luck" on the bottom of her recipes. I wonder if she thinks that the recipes are that hard - or that I'm that awful of a cook. Anyhow, these are awesome and are well worth the work. This does make a pretty big batch, so if you're eating them yourself, you may want to half it.


Peanut Butter Balls


1 24 oz. package of Chocolate Almond Bark
(for reasons which I will demonstrate later chocolate chips are not an acceptable substitute)


1 stick butter
2 1/2 c. creamy peanut butter
1 box powdered sugar (or just over 3 1/2 cups)
3 c. Wheaties or corn flakes or Special K or whatever kind of generic tasting cereal you have on hand, crushed

In a bowl mix all ingredients except the Chocolate Almond Bark.
If the mixture is soft, refrigerate it before you form the balls. . . if you used too much powdered sugar, feel free to roll away.

Melt the bark and dip the balls into the chocolate. Cool on waxed paper and then return them to the fridge (or freezer if you're working on them in advance).


This is what happens when you try to use chocolate chips. Obviously, chocolate chips would be an awful idea. However, tonight, I'm sleepy. I didn't have the recipe with me at the store, and I guessed chocolate chips. Lesson learned. I will be forced to bottle this and use it on ice cream. The important thing to remember as a chef is that sometimes, you have to make sacrifices.


Shelly

One beautiful fall day not too long ago, my ENT suggested that I have my tonsils out. Trusting his knowledge and theoretically sage advice, I decided to do so. I warn you now. . . do not EVER trust a medical professional who wants to rip your tonsils from your body. This hurts very very very much. After two weeks of not being able to eat and actually enduring stomach cramps due to impending starvation, I am finally (somewhat) normal. The funny thing is, the whole time that I was slowly starving, I kept thinking about food, and watching the food network, and flipping through cook books. Maybe it was a coping mechanism, or maybe it's the impending holidays. . . but I couldn't help it. So, I emerged from my ordeal with a little time on my hands and a strong desire to eat pizza, sushi and onion rings (don't ask).

I decided to skip the onion rings and make cookies instead. Lately, I've made my fair share of deserts. Someone in the house, who isn't me, has an insane sweet tooth. Typically, we do pies - chocolate pies. I could make a chocolate pie in my sleep. But this time, my desire to recreate something so simple and elemental won through. I was lazy and just used the Nestle Toll House recipe. I'm going to cheat. Instead of copying it down, you can go here. That's not too much to ask is it? http://www.verybestbaking.com/recipes/specialty/nth-detail-occc.aspx Or am I supposed to actually type out the whole recipe? That would be a huge waste of time when there's cooking to do. Here's the verdict. They turned out okay. . . decent. . . edible? There definitely has to be a better chocolate chip cookie recipe out there. And I know that there are definitely better chocolate chips. Who would have thought that Nestle chips are so inferior? The cookies tasted entirely too sweet. The point is, though, to go out there and make cookies!
Okay, maybe I'm getting carried away. I mean, I haven't done a day's work in about two weeks, so it's really no surprise that by this point, I've decided to wash five loads of laundry, make cookies, make homemade ice cream (my grandma's recipe - definitely worth sharing later), make a slow cooker full of potatoes, carrots and turkey, and contemplate the possibility of sweet potato casserole. All the while wondering who is going to eat this since the fridge is already full of homemade arepas, spaghetti sauce, burgers, and enough dollar general cookies to choke a horse. Oh well, c'est la vie.
Sarah Ferstel
Ciao, ragazzi!

As promised, I managed to wrangle someone (thanks, Ilya!) into taking pictures of me while I made homemade pasta.

I was going to write a little something about the history of pasta, but it turns out that everyone's version of this history depends on how you define "pasta" and whether you are Italia-centric or not.

There are a variety of ways to make homemade pasta, but I'm going to show you the simplest way I found. Aren't you glad?


Ingredients:

2 eggs
1 cup of flour (I used the same flour that I used to make cupcakes, but please let me know if there is some better, more magical pasta flour that you've used)

Equipment:

1 pasta maker (aka Pastalina, my darling hunk of metal)
kneading mat (optional, but oh so handy)

Step one:

Dump the one cup of flour onto your kneading surface (which should be clean and dry) and make it look like a little Mt. Vesuvius. In a small bowl, beat the two eggs together.


Now, pour the beaten eggs into the volcano. Using a fork, mix the eggs and flour together on your surface. You're going to make a mess - get over it!


At a certain point, put aside the fork (I know, it's hard, but you can do it) and finish mixing the egg and flour by hand.

*Do not put your fingers in your mouth after touching the raw egg. That is a no-no.

2) Once the ingredients seem evenly combined, start kneading the dough. You'll need to do this for about 5 minutes.


Kneading is hard work!


Check out my awesome technique!


If you are unfamiliar with how to knead pasta dough, or any dough, you can check out some techniques online. A quick Youtube search will bring you quite a few results. Make sure to look for "how to knead pasta dough" or something similar. Otherwise, you'll find techniques on how to knead dough for breads that rise. You don't want that.


My basic kneading technique involves pushing the dough with the heel of my hand across the surface of the counter, turning the dough, kneading, turning, kneading, etc.

The recipe calls for kneading the dough for 8 minutes, but I found that 5 minutes of kneading worked well. The whole point of all this kneading is to "strengthen the gluten" or to make a dough that won't tear in the pasta maker.

When your dough is completely kneaded, you should be able to stretch out the dough (like I'm doing in the picture below) without tearing the dough.


Next, cut the dough into 3 equal pieces and then thin them out by stretching them until they are about 1/4 inch thick.

When using a pasta maker, always set the rollers at the widest setting first.


Pastalina has "7 settings of wonder" and I put the dough through setting #7, the widest, first and then turned the crank to run the dough between the rollers.


Next, I set the rollers to #6 and put the dough through again, and so on until I got to setting #1.

Eventually, your dough will get very thin and very long.


You could leave this out to dry to make lasagna or cut it up and make ravioli, but I wanted some fettuccine so I ran it through Pastalina's 'sketty-side.'

(Yeah, I realize it says 'Al Dente' on Pastalina. Apparently, Al is Pastalina's ex-boyfriend and she doesn't really want to talk about him or how much she regrets this "tattoo.")

And then layed out each individual strand of pasta to dry on paper towels.


Fresh pasta can lay out anywhere from 10 minutes to 24 hours in fairly dry conditions (say, an A/C'd Louisiana apartment in October), but after it is dried you'll need to store it in an airtight container.

To cook, simply throw the pasta into a pot of boiling water (no oil) for about 2-4 minutes depending on how al dente you like your pasta.

Buon appetito!
Brett Chiquet

So October in dental school can suck, a lot, so my practice leader decided that we needed a practice pot luck, and since it was going to be the day before Halloween, she thought that we should all bring some ghoulish dishes. I signed up for "deviled mice" and while searching for ways to improve it, I also found another cute idea for "eye of newt". Of course I had to make some changes, and I was very happy with how they came out. Here's how they're made:

Boil eggs, let cool, peel, slice in half (length-ways) and remove the yolk. Side story- as much as I love to cook, every time I have to boil eggs I lose confidence in myself. Do I boil them for a certain amount of time and then rinse under cold water? Do I bring them to a boil, cover and then remove from heat for 15 minutes??? I'm so confused. Shortly after I graduated from college I was enjoying cooking all these new meals and I remember having to call home to ask my mom how to boil eggs. Embarassing, and I still haven't gotten over this. To set the records right, this time I brought the eggs to a boil, covered, removed from heat and then let cook for 15 minutes before cooling in ice water.

Combine all of the yolks in a bowl. Add mayonaisse (I used ~ 1/2 cup for 18 eggs) and yellow mustard (I used ~ 1 TBSP). Just make sure its a consistency you like. Add salt and pepper. Because I was using this as the basis for both eye of newt and deviled mice, it's time to start assembling the deviled mice.

Deviled mice: slice ~ 5 olives. Place a couple of slices into each of the spaces the yolk occupied. Then fill with yolk mixture. Do not over fill, as these will be placed yolk-side down on your serving dish. To make look like mice, cut 2 toothpicks in half for whiskers, arrange 1 olive slice with pimento as the eyes and ears. The original recipe suggested placing an olive slice as the tail and then use chocolate sprinkles as droppings. While cute, I didn't have enough room for the tails and most of my friends know that I truly dislike chocolate, and I thought the mice were cute enough as it.

Eye of Newt (sweet and spicy): Tony Packo's has the BEST pickles ever! The only problem is that they are based out of Ohio and I have to order them online, but it is totally worth it. Start out by dicing sweet and spicy pickles and placing a couple into each of the spaces the yolk occupied. Now, add 1 tsp Tobasco, 1 tsp of Sriracha and enough blue or green food coloring to give the filling a greenish tint. Spoon into eggs, you can overfill. Next place a black olive slice on top of the yolk mixture. Fill the center of the olive with white horseradish. Next, mix a little red food coloring with horseradish sauce and paint jagged lines on the eye whites.

Enjoy!
Sarah Ferstel
Oh, dearest readers!

I'm so sorry for the long delay between posts. Hopefully, your lives have been filled with other frivolities and you have not been made desperate by the dearth of posts on this blog.

/apologies and beseeching for forgiveness

Here's what I've been up to while away from the blog.

1) For Kate and Dimitri's wedding, I baked about 120 cupcakes (see picture at left). All my practice sessions this summer really paid off and the lemon and devil's food cupcakes were a hit. I had a little help from some of the wedding guests, but, all in all, I spent about 8 hours baking and frosting these tiny, cakey, cup-sized, bits of joy.


Most importantly, the bride and groom loved them.

PS- check out their wedding buffet! It was beautiful and delicious.


2) I made an awesome mushroom, caramelized shallots, and fontina cheese quiche, but I won't go into details since Shelly already posted about quiche.


3) For Ilya's birthday, I made a fig jam crostata. It's super simple to make. Take a pie crust, either store bought or homemade, put in the pie pan. Mix 1 and half cups of fig jam with tsp of almond extract and two teaspoons of lemon zest. Pour into pie crust. Then top it off with another pie crust (or cut up the second pie crust into strips and criss-cross them). Bake for 45-50 minutes at 350. It's super easy.

Here's a link to a more complicated (and more authentic?) recipe for Italian fig crostata.

By the way, you can use whatever jam you like and some people may even like to mix different jams together. Experiment! Have fun! Mangia!

4) Also for Ilya's birthday, I made homemade pasta. Kate's mother sold me this beautiful pasta machine. I love it so much, and it's not as scary to use as it looks.

Here's my beautiful machine. Her name is Pastalina and she's the prettiest pasta maker in all of pasta-dom!


Sooooooo shiny! Don't get too mesmerized by her beauty. She's mine, all mine.

I'll tell y'all all about making pasta from scratch when I can cajole someone into taking pictures while I make it. My hands get way too messy to take pictures myself.

5) Coming up this weekend, I'm going to make Halloween cupcakes (Hi, my name is Sarah and I'm addicting to making cupcakes). Look out for pictures of those too.

Hopefully, my fellow bloggers will post soon too. Hint, hint, hint...

Shelly
When Sarah came to visit this past weekend, we were talking about food (of course), and it came up that we had both made quiche last week. I wonder if the beginning of Autumn triggers some subversive quiche cravings in the modern mind. Regardless, I promised to post something about the wonderful conjoining of pie crust, egg and cheese. A week later, after a diagnosis of possible mono, I'm finally getting around to it. Because it's so tedious to sit down and write about eggs, right?

So, my quiche story is quite recent. It was never something that I had growing up. It's funny to discover these foods and wonder how on earth you've missed them for so long. . . . especially something like this. It seems like quiche (well some of them) would have been perfect on fridays during Lent. Goodness knows that I wouldn't have complained if we ditched the tuna salad sandwiches from time to time. Alas, it took going away to college for me to discover this, apparently German, culinary delight which has been popular in America since the 1950s (aka long before I was around). http://www.foodreference.com/html/artquiche.html

I can't say that I remember the first time that I ate quiche, but I do have fond memories of the first time that I cooked quiche. One of the grocery stores in town decided to stock feta - which doesn't seem like a bad idea at all. However, the population of Natchitoches, Louisiana, apparently didn't feel a need for feta at the grocer's. . . which left them in a real pickle. To clear the shelves, God bless them, they marked down all of the feta to 50 cents a package. Being an impoverished college student, I decided to purchase an unseemly amount of cheese. The lid of the feta container included a recipe for quiche - which seemed too easy to be true. Now, I had a ton of feta, a recipe for quiche, and eggs are super cheap. . . so we hauled out Crissy's copy of Where's Mom Now that I Need Her? http://www.amazon.com/Wheres-Mom-Now-That-Need/dp/0961539011/ref=sr_1_1?ie=UTF8&s=books&qid=1253802089&sr=8-1 (a book that every graduating senior should get as a gift) and found an even easier recipe and got to cooking. The feta stayed that cheap for months, and we ate an excessive amount of quiche that semester.

I'm not going to tell you that I don't like quiche with all kinds of fun meat and veggies in it. I was even looking at a recipe recently for a Spanish version of some sort with potatoes and will probably try it soon. However, when I think of quiche, I think of this very simple method of combining those few main ingredients which create cheesey, eggy perfection. I never use a recipe anymore, so this recipe is going to sound like one of those annoying recipes that you get from old people who have been cooking their whole lives and are just guessing at measurements. Fortunately, eggs are cheap, so if you screw this up (and how could you really?) just pawn it off on some unsuspecting and hungry person and start another, tweaking things to your taste.

Quiche
1 frozen pie crust (I prefer the deep dish crusts)
6-8 eggs
1 pkg. feta cheese
1/2 c. cream (or whole milk)
salt and pepper to taste

Simple as pie. . . preheat the oven to 350. Scramble the eggs in a large mixing bowl. Add the cream, salt and pepper. Sprinkle the cheese on the bottom of the pie crust. Pour the egg mixture on top, and bake until done. I think that this usually takes 30-45 minutes in the oven, but you'll really just need to keep an eye on it. The top will start to turn a light golden. That's when you'll want to take it out. And voila!
Sarah Ferstel

Tabbouleh here I come!

About a year ago, I moved into a very cute apartment in a very cute part of town. I live on the second floor of a small apartment building (12 units in all) set around a pretty courtyard with a garden. My landlord tends to the garden in the courtyard and it's filled with beautiful flowers and plants, many of which I've never seen before. I guess all that flora got to me and for the first time in my life I decided to start my own little garden this past spring.

I didn't really have a game plan, per se. I started off with one of those garden herb kits you can get at any mega store (Super Target is my 'local business destroyer' of choice), and was pleasantly surprised with how easy it was to grow basil, chives, and parsley on my kitchen windowsill. For those of you who are discouraged by the cost of fresh herbs at the grocery store, I highly recommend growing your own. It's very simple (I bought a child's kit, to be honest), and cheap. By now, I've probably grown over $50 worth of herbs, and I paid less than $10 for the kit.

Feeling confident, I decided to branch out from herbs and venture into the world of veggies and flowers. I went to Clegg's, my local nursery, and bought a few pots of varying sizes, seeds, dirt, and some fertilizer. Using the windowsill in my living room, I started a mini green house growing cherry tomatoes, morning glories, snap peas, and sweet peas (the flower) from seed. After they reached a certain height, I moved them to bigger pots outside on my landing.

As you can see, the morning glories have done a great job of taking over the railing. The tomatoes have also grown much larger than I anticipated (one of the plants is taller than me!), but the snap peas couldn't take the harsh morning sun and the sweet pea died off, too. But I wasn't discouraged. I went to my local farmer's market and bought plants that like baking in the sun: rosemary, black-eyed Susans, and some other flowering plants with names I can't recall.

Unbeknownst to me, there is a whole container garden movement. I'm not surprised as it took very little effort or gardening knowledge to get my plants going. If yuppies and hipsters in NYC can grow plants, then there is no reason a gal from Louisiana can't! Sure, I wasn't always successful, but I managed a sweet little garden.

I'm pretty proud of these plants. I'm nice to them, and, in return, they make yummy things for me to eat and pretty flowers for me to look at.

PS- Bonus points to whoever can guess the origins of the quote in the post title.
Sarah Ferstel
In the two weeks since my last blog, I've been a busy little baker bee as I continue testing out cupcake recipes to be used at my friend's wedding. Not only did I try out a second recipe for the lemon cupcakes, but I also managed to create some very ugly swamp cupcakes, and I made some beautiful Devil's food cupcakes with blue cream cheese icing. My coworkers have been very grateful and eager guinea pigs, but I do feel the tiniest bit of guilt about edging them towards diabetic shock on a weekly basis. Oh, well.

For my second try with lemon cupcakes, I used bellaluna221's recipe found here. I preferred the lighter taste and texture of these cupcakes in comparison to the first batch I made, but my friends and coworkers disagreed. They really liked the first recipe's rich texture and lemony taste. The people have spoken and I guess I should follow mob rule.

Shelly was kind enough to come over and help me with these lemon cupcakes. She also took lots of pictures documenting my experiments in decoration. In the picture to the left, you can see that the cupcakes at the top of the photo have been sprayed with edible pearl luster and then topped with various candy or zest decorations. The cupcakes at the bottom have only been sprinkled with edible glitter dust mixed with powdered sugar. It's difficult to see the glitter in photos, but in person they are very pretty.

After my great success with the lemon cupcakes, I moved on to the "Blue velvet cupcakes." The idea was to use the recipe for red velvet cupcakes, but use blue food dye instead of red. I warned the bride that the blue might not mix very well with the cocoa, but I told her I'd give it the old (post) college try. When I saw the color of the batter, I laughed out loud. The final baked cupcakes weren't much better, but they really taste great - very moist and delicious - you just have to get past the fact that they look like moldy, green rocks.


There's no way in heck I was actually going to share these at work, so I saved a few to scare my friends and threw the rest away. I can't have people associating my baking with swampy cupcakes.

Moving past the "blue velvet" disaster, I decided it was time to try out the Devil's food cake recipe I have. These came out perfectly rich and delicious. I topped them off with pretty blue cream cheese frosting and sprinkles.


I used a variety of toppings including non-pareils, sugar crystals, and the sparkle dust (which didn't show up against the blue very well).

I'm making the lemon cupcakes by request for my father's 60th birthday (!), and then I'll make the devil's food cake cupcakes with mocha icing. Once the wedding is over, and my cupcake journey comes to its end, I think I'll take a long and well-deserved break from the world of cupcakes.

Maybe I'll start experimenting with beef.
Sarah Ferstel

As some of you know, I have been asked by my dear friend, Kate, to make cupcakes for her wedding in October. These cupcakes (Lemon, Devil's food, and Blue velvet) will be a cheaper, cuter, and yummier substitute for a traditional wedding cake. Serving cupcakes at weddings is a fairly popular trend now, and we are whole-heartily jumping on the band wagon. Considering that wedding cakes are typically over-priced, dry, and covered in fondant (blech!), this trend seems pretty reasonable in the wacky world of wedding wallet wastage.

To the delight of my coworkers, I have started testing cupcake recipes and bringing the results to work. So far, I've only brought in Red velvet (at the bride's request, I'll use blue food dye instead of red for the wedding) and this past weekend I made lemon cupcakes. I used a recipe found at Geek-kitten's livejournal blog, and though I received many complements, I'm not 100% satisfied with the outcome. The flavor of the cake is very good, but the texture is a little too crumbly for my taste. My friends insist I'm too picky and that they really like them, but these are for a wedding and I want to find the best recipe out there.

Kate, the bride, has been an enthusiastic accomplice in my cupcake endeavors. She has even ordered edible pearl luster spray that I'll wield like a Tanning Salon Maverick and give those girls (read: cupcakes) a beautiful summer glow! She also ordered bronze spray for the Devil's food cupcakes and blue for the blue velvet cupcakes. I can't wait for these weird bottles of sprayable candy to arrive.

So, back to the cupcakes. When looking for a lemon cupcake recipe, I really didn't have much in the way of criteria beyond (1) I wanted the ingredients to be easy to find and (2) the recipe should be pretty straight forward. I've looked through plenty of recipes online, and many of them call for intricate maneuvers that would be feasible if I weren't trying to make several dozen cupcakes.

Following Geek-kitten's recipe was easy, but I would recommend filling the baking cups only 3/4 full instead of nearly to the top as she has suggested. Filling the cups too full resulted in a muffin shaped cupcake (see pic below) for the first batch. For the second batch, I filled them 3/4 full and the results were a recognizable cupcake shape.


While the cupcakes were cooling, I made the frosting. The original recipe for this frosting is here, but I tweaked the recipe. Here's the ingredients and amounts I used.

2 sticks, unsalted butter (softened to room temp for about 30 minutes)
1/3 cup of Crisco (weird, right?)
2 cups of powdered/confectioner's sugar (you might want to add more depending on how sweet your tooth is)
1 tsp of vanilla extract
1 tbsp of fresh squeezed lemon juice

Mix it all together with an electric mixer, slop it into a frosting bag, squeeze, and voila!


As adorable as these are, it was obvious that I needed to up the cute factor so I added jelly beans and small slices of lemon to the frosting.


Cute, right? I'll be making a second batch of lemon cupcakes later this week with a different recipe and with the lustre spray. I'll post the results here, of course. TTFN!
Shelly
So, I'm going to cheat and not include a recipe here at all. If you're so inclined to cook this mystery dish, you can haul out your copy (or check one out at your local public library where there are tons of librarians just WAITING to help you) of Julia Child's Mastering the Art of French Cooking Volume One. . . then turn to page 407. There, on that very page, you will find. . . are you ready for this? Foie de veau a la moutarde. . . aka Liver with Mustard, Herbs and Bread Crumbs.

I have to confess, I've owned my copy of Julia's cookbook (and Louisette and Simone) for over a year and haven't cooked any of the recipes. I had decided when I first acquired the book (through nefarious means) that I needed to eat better - like a FRENCH person. I was going to live off of recipes from the book. And then I actually started to look at the recipes and quickly changed my mind. I think that's why I was so fascinated when I began to read Julie and Julia. Julie had made the same decision and followed through with it. In a way I envy her, and in a way I'm glad that she did it, so I know in advance that I'm better off cooking a Julia Child recipe once every two years or so.

When I was reading Julie and Julia, there were a couple of recipes that she mentioned that really caught my attention and stood out to me. I'm sure that this is a fairly common experience. . . Miss Powell is an entertaining storyteller after all. So, this recipe was one of those that really caught my attention. . . and since there are no lobsters writhing around in tanks in Donaldsonville. . .

Okay, I'm going to be honest here. My dad fries beef liver about once a year. My mom always refuses to be in the house when this happens and rarely eats it herself, always in a gravy, never fried. I've never been able to handle liver or do the cooking myself because the texture of it raw really freaks me out. However, I would always eat a piece when dad fried it up (although I won't go near it in a gravy). Since I've been out of my parents house for a little over ten years, and fried liver isn't always that easy to find in restaurants. . . . okay, there's no real justification for craving liver. However, that IS the one recipe that I really wanted to try. I don't know how many people that I've told that I was cooking a Julia Child liver recipe tonight. I've sent Sarah at least six e-mails trying to convince her to come and visit me in my lonely apartment and to experience this with me. . . Alex has even run away across the entire state. . . I can't imagine why, but no one wanted to be here. . . which leads me to my question. . . what did Julie and what's his name do with all of their leftovers? Imagine this. . . she was cooking every day. Most of these recipes serve 6-8 people. . . and sure your friends come over. . . when you're cooking lobster. . . but what do you do with all of the leftover liver?

That is for me to know, and you to find out. . . ha ha ha ha ha. . .

(Actually, it came out quite tasty, if you were wondering.)
Brett Chiquet

Living in Houston, there’s a great variety of different cultural eateries on every corner. We live almost across the street from this AMAZING dumpling place (http://www.b4-u-eat.com/houston/restaurants/%20reviews/rsv0646.asp), and their dumplings and green onion pancakes are to die for! Normally I wouldn’t even bother attempt to make my own when I can walk across the street, but a co-worker of mine brings dumplings to a lot of our lab pot lucks and before she moved, I decided I should learn some basics from her. The basic filling recipe, purse-making and cooking method ideas came from her. She recommended I start by finding fresh pre-rolled dumpling dough at my nearest Asian supermarket. I checked at a couple of my local non-Asian supermarkets (not wanting to drive over to the Asian part of Houston) and figured it would be less-lazy of me to make my own, so after a quick google-search for Chinese dumpling recipes, I think I found something that would work (http://userealbutter.com/2007/10/04/chinese-dumplings-and-potstickers-recipe/). *Note: this links to another blog that has a great description of the entire process. However, being someone who finds it hard to follow recipes, I had to add my own touches. Michael has been craving fresh-peach pies from House of Pies (amazing diner in Houston, and the one near our place was where the first portable computer was sketched http://en.wikipedia.org/%20wiki/Compaq). Chinese dumplings don’t typically go with peach pie, but Michael’s from Georgia, where they like their pork BBQ and peaches, so I thought I’d attempt an Asian pork BBQ dumpling to go along with the peach pie that I picked up from the restaurant. Let the fun begin!

Asian Pork BBQ Dumpling filling:
1 fresh peach, finely minced
1/3 cup honey
1/3 cup soy sauce
2 T sugar
1 lb. ground pork
4 green onions (greens and whites), finely minced
½ package of mushrooms
¼ cup ginger, finely minced
1 t ground white pepper
1 clove garlic, finely minced


Dough:
2 cups of flour
½ cup warm water
Pinch of salt (because all dough needs a little salt)


Dipping Sauce:
Freshly minced ginger
Freshly minced jalapeno
Soy sauce
White vinegar
Sesame oil


To prepare the filling:
Combine first four ingredients, let sit in bowl while mincing the other ingredients. After all ingredients are prepped, mix in large bowl and refrigerate until dough is ready.

To prepare the dough:
In bread machine (because I can), add ingredients and set to “Dough” setting.

To make the dumplings:
Pinch off about a 1-inch round ball of dough. On a lightly floured surface, roll into a circle. Place in the palm of your non-dominant hand. Add 1 Tbsp of filling to center of palm and fold into purse. Okay, so check out Jennifer Yu’s blog (http://userealbutter.com/2007/10/04/chinese-dumplings-and-potstickers-recipe/) for pictures and instructions. I mostly followed them J Just make sure you get a good seal on them, otherwise you’re in for soup!

To cook the dumplings:
Bring a large pot of water to boil. Add the dumplings. Gently stir so they don’t stick. Once they start to boil, add 1 cup of cold water. Once they start to boil, add another cup of cold water. Once they start to boil, remove from boiling water. I wanted mine to have a pan-fried bottom, so I transferred them to a warm, buttered sauté pan until they were golden brown on the bottom.

Dipping sauce:
One of the best things about the Dumpling King is the Do-It-Yourself dipping sauce. So, each eater can combine the 5 ingredients into their own concoction.

Afterword:

Okay, so everything was delicious! I couldn’t get the dough just right, and pastry was a little thicker than ideal, and I only ended up making ~12 dumplings (that were pretty large). But the important thing is that none of the pouches burst open! The remaining filling I made into little meatballs, which I served over bow-tie pasta (limited resources in my pantry that week) with a quick sauce of ginger, soy sauce, carrots and the rest of the mushrooms. I also made some green onion pancakes (regular pancake mix, followed directions, added remaining green onions). Not too bad. Desert was the regular peach pie from House of Pies. It wasn’t quite fresh peach season, so had to settle on that. It was still good. I’ve since had the fresh peach pie and it really is delicious.
Sarah Ferstel
Bebe and me, 1983

On July 27th, my grandfather, "Pop-pop", called to let us know that my grandmother, Shirley 'Bebe' Hutt had passed away. Bebe is the pepper to Pop-pop's salt, and I don't think any of us were quite ready for her to go. I won't dwell on the details of her death or my family's grief. Instead, I'd like to use this space to reminisce about the food that I ate at my grandparents' homes in New York and New Jersey.

I know that Bebe cooked many meals in her lifetime, but I actually don't have too many memories of her particular recipes. Off the top of my head, I can only recall the pot roast and her stuffed artichokes. Her kitchen in Long Beach, NY, was tiny and not conducive to more than one cook. So, I never really helped her in the kitchen much. Later in the week, I'll share my grandmother's Ginger Snap pot roast recipe, but for now I'll just give y'all a peek into my family's kitchen and dining room. Here's a brief list of my childhood favorites.

1) Jello pudding pops - loved by Bill Cosby and the Hutt grandchildren. I'm sure most of my clothing had stains from these fast-melting treats. They no longer make these *cries and cries,* but click here for a recipe of the homemade version.

2) Tree top (?) apple juice in the small cans with the sticker pull tab - the perfect amount of apple juice for this former juice fiend.

3) Olives, pickles, and anything else related to those two food groups. My grandparents' supply of these is second only to the Olive bar at Whole Foods. How many young kids do you know who love kosher dill pickles and kalamata olives? I've only met a few and they're all related to me.

4) Bagels and lox - I'm not a fan of lox and I get a lot of flak for this in my family, but I'll eat a whole, gigantic NY bagel with gobs of cream cheese to prove that I'm serious about breakfast.

5) Coffee - Regular is available at all hours of the day in varying degrees of freshness and temperature.

6) Candy - Ah, the constant availability of M&M's, Dove chocolate, and York peppermint patties drove my mother nuts. Bebe and Pop-pop always have a little bowl of at least one of these candies out. As a kid, I was very adept at taking from these bowls when my mother wasn't looking. In fact, all the Hutt grandchildren have reached an advanced skill level for surreptitiously eating small amounts of candy when our mothers aren't looking. Sorry, Stefan and Mikey - the gig is up.

7) Those little boxes of General Mills, or Kellogg's, cereal that come in a variety pack. I lived for those as a kid. LIVED FOR THEM!!!!

8) Brie (and Jarlsburg, and Cheddar, and on and on) - Pop-pop has discovered in the last few years, or maybe earlier, that brie on bagels is pretty freaking fantastic.

*Side story: I once showed Pop-pop that the best way to soften brie from the fridge is to microwave a plate (just the plate) and then place the brie on the warmed plate for a few minutes on the counter. It's a gentle way to warm the brie without actually nuking it (God forbid!). Pop-pop was very impressed and I got lots of kudos the rest of the morning!

9) Salmon patties with Spanish olives. I can't remember if Pop-pop ever made these at the Long Beach house, but he made them for me when he and Bebe lived down here in Louisiana for a few months when I was 13-14 years old. My love for these is natural (please see #3).

10) Beer - Pop-pop would poor a little of his Heineken into a juice cup for me when I was a kid (my mother just learned of this - I guess she thought it was apple juice). Since Bebe was drinking her White Zin from a juice cup too, I felt pretty grown up while I sipped my 2 ounces of beer.

I'm sure my cousins (Angelica, Arielle, Sasha, Stefan, and Michael) have many of their own particular memories, but these are the ones that are most prevalent in my mind right now.

I think everyone should add your favorite grand-parent related food memories in the comments section!
Shelly
When it comes down to it, you can group recipes into a very few amount of categories. There are the recipes that you keep telling yourself that you're going to try. There are recipes that you look at and think that you would never take the time to make or would never want to eat. There are the recipes that you've tried once or twice and remember fondly. . . and there are the recipes that you absolutely can not live without. This is one of those recipes that I absolutely can not live without. . . not because it blew my mind the first time that I made it. . . just because it's good. It's real food, the kind of food that my mom would have made when I was growing up - if she had cooked more, and if my dad would have been willing to eat stew.

The recipe actually comes from a cookbook that my elementary school compiled when I was in third grade, courtesy of Mrs. Norma Nix. (Her son was a year above me and a real jerk - which did not keep Maria from having a huge crush on him in high school.) I never got around to making it, though, until a few years ago. . . when I was going through this phase of romanticising life on the prairie and wishing that I had been a pioneer. . . spending long days outside and evenings in a flannel nightgown by the fire. . . with a garden out back, a cold cellar, and thirteen children running around barefoot and dirty with the puppy dogs in the back yard.

Chuck Wagon Stew
1 tsp. sugar
1/4 c. flour
2 lb. cubed beef
2 Tbsp. shortening
2 tsp. salt
1/4 tsp. pepper
1 tsp. chili powder
1 bay leaf
2 tomatoes, peeled and quartered
1 (10.5 oz.) can beef broth
6 small potatoes
6 small carrots
6 small onions
3 or 4 stalks celery (I never use this because celery is gross)
1 c. frozen peas (And I have never once remembered to buy peas, so this always gets omitted too)

Combine sugar and flour. Coat beef and brown in shortening. Add seasonings, tomatoes, and broth to meat. Cover and simmer 1 to 1 1/2 hours or until tender. Stir in vegetables, omitting the peas. Cover and cook about 30 minutes. Add peas. Cover and cook about 15 minutes.

Aside from the time that it takes to cook, this is a really EASY recipe - translation, you don't have to chop the veggies which equals awesome in my book. Ha. I'm such a lazy cook.
Sarah Ferstel
Stacie and I, NYE 2007

Well, the collection of contributors to this blog is clearly incomplete without my dear friend Stacie who is one of my favorite baketresses. Stacie makes awesome cupcakes, cookies, Oreo truffle thingies, and, well, non-desserts as well. This past week she invited me over for turkey burgers with Gruyere cheese, sweet potato fries, and a tomato salad that was simple and delicious. We finished off the meal with espresso cupcakes - yum!

At dinner, I told Stacie that I had offered to make cupcakes as a wedding cake for my friend Kate's wedding. My biggest obstacle, so far, has been the frosting and Stacie offered to teach me her buttercream icing recipe. Once I get a hang of it, I'll post the recipe (with pictures) here.

So, welcome Stacie and get posting!


Labels: 1 comments | edit post
Shelly
Any good food blog should begin with a favorite recipe from your grandmother!


Of course, this wasn't my original intention. Originally, I was going to go on about the time that Sarah and I made pain au chocolat and filled up an entire 1000+ square foot apartment with smoke just because we used the wrong pan.


*Here's a helpful hint. . . be sure to use the right dish for the job. It could make the difference between a happy chocolate filled evening and a smokey chocolate filled evening.*


But, since I couldn't find that recipe in my trusty recipe box (Believe me, you don't want to see what the inside of this looks like.), I decided that I should ramble a bit about my grandma. That's really where the love of food begins, if you think about it. . . or at least where it began for me. I have so many fond memories of sitting around her house in the morning drinking coffee milk and eating Little Debbie snacks for breakfast - both treats that had no place in my mom and dad's house. As an adult, I've spent a good deal of time in antique shops and thrift stores rejoicing when I find a recipe box just like my mom-mom's. . . or that goofy Corning Ware with blue flowers because that's what she has stacked in her cabinets. I'm not even going to go into how expensive those stinking melamine Texas Ware mixing bowls are. It's funny because no matter how many retro pieces of kitchenware I buy, my food never does come out tasting like hers. That being said, as I was going through the recipe box looking for that pain au chocolat recipe, I came across my mom-mom's Pineapple Cake Filling recipe. It's a shame that no one bothers to make good cakes anymore. This has always been one of my favorites and is apparently something that's fairly universal among the older crowd. One of my good friends at the library, Mary, went on and on about how good her Pineapple Cake Filling recipe was one day, and I started to laugh when she was telling me the recipe. It's this exact one that my grandma makes. That being said, if your grandparents are still around, you probably have this one tucked in your recipe box too. . . but, for those of you that have lost the recipe or were never fortunate enough to have it. . . you're in luck. I'm going to copy mom-mom's recipe card word for word, so you don't miss anything!


This is for a 3 layer cake & top. I don't use icing.

Pineapple Cake Filling


1 large can crushed pineapple

1 cup sugar

1/2 stick butter

1 1/2 tbl. cornstarch, disolved in 1/4 cup water, cook until mixture starts to boil & thicken. Cool before using. If you have too much, you just eat the rest. It's good.


She also included the recipe for Coconut Filling even though she knows that I hate coconut. Nice, yeah? So, you get an extra recipe just because. . .


Coconut Filling for 1 Cake


3/4 cup sugar

1 tbl. corn starch . level spoon

1 cup can milk

1 egg yoke cook until thicken add 1 teaspoon flavor & coconut. I don't measure the coconut. Add what you like.


And that's that. To be fair, my grandma's not really a poor speller. . . Did I mention that she was cajun and that French is her first language? And she's pretty old and senile. . . ha ha ha. . . but I love her.
Sarah Ferstel

Bossy Italian flatmates who taught me about basil and tanning.

In order to complete my food blog trifecta (and so begin world domination!), I have invited my friend, Shelly, to join our little corner of the culinary universe. Shelly, who is not in that picture above, is another dear friend from college and she is a fantastic cook. She is also a patient friend as evidenced by our numerous attempts to cook together. These get-togethers usually involve Shelly politely, if not sternly, shooing me away while she tries to make something terrifically edible. I'm usually just there to prance around the kitchen and pretend like I know what I'm doing.

One of our most successful, but exhausting, cooking binges involved tackling multiple recipes from Marcella Hazan's "Essentials of Classic Italian Cooking." If you do not own this book, then you are missing out. Marcella has written one of those fantastic cookbooks that you actually enjoy reading from cover to cover. For those of you not initiated into cookbook reading, this may sound odd, but it's actually a very good way to learn about cooking (duh!) and food.

I don't remember all the recipes we prepared that night, but I do remember making Marcella's stuffed mushrooms. I LOVE MUSHROOMS! Sorry, I had to get that out in the open. I hated mushrooms as a child (remember, I was a picky brat), but now my love for mushrooms has grown to such an extent that my (future) children will have to work hard to win that part of my heart. Sometimes, I just put raw mushrooms in a bowl with olive oil, salt, and pepper and eat them like a salad. Hmmm, I wonder if I have any mushrooms in my fridge now? Concentrate, Sarah.

Baked Stuffed Mushroom Caps (the words in italics are me)

6 servings (but I can, and have, eaten them all by myself)

Ingredients:

  • A packet of dried porcini mushrooms (about one ounce) - I've noticed that stores don't have a standard place to shelve these. I've found them in produce, with the 'ethnic' (i.e. Italian) food, or with the spices.
  • 1/4 heaping cup crumb (the fresh, soft, crustless part of bread)
  • 1/4 cup of milk (Use whole milk. Buy the little single servings if you don't want leftovers.)
  • 1 pound of fresh, stuffing (large) mushrooms ♥
  • 1/4 pound pancetta (This is a type of distinctive tasting Italian bacon that I've never added when making this. I'm one of those Jewbies who tries, but does not always succeed in, avoiding the oink.)
  • 4 flat anchovy fillets (Again, I've never added these only because I don't like anchovies, but feel free crack a can open if you wish.)
  • 4 fresh basil leaves, torn by hand into small pieces (Okay, newbie cooks, here's a good moment to point out something that many of us oldbies have already discovered. Fresh basil is 100 million times better, and different, than dried. Yeah, it's expensive, but skip the packaged b.s. and buy the dumb plant. Seriously, I have a million potted basil plants and you need no gardening skills to keep them alive. Also, it may seem weird that Marcella instructs you to 'tear' the leaves, but trust me, and two bossy Italians - see pic at top of post - who told me personally, this is the best way to release the basil's flavor.)
  • A small garlic clove, chopped fine
  • 1 egg
  • 3 tablespoons (fresh) parsley chopped fine
  • 1/8 tsp. dried marjoram, or 1/4 tsp. chopped fresh
  • salt and pepper
  • 1/2 cup dried, bread crumbs
  • 1/3 cup extra virgin olive oil
Instructions verbatim from the book:

  1. Put dried mushrooms in 2 cups lukewarm water and let them soak for at least 30 minutes.
  2. Put the soft crumb and milk together in a small bowl of deep dish and set aside to soak.
  3. Wash the fresh mushrooms rapidly under cold running water, and pat them thoroughly dry with paper towels, taking care not to bruise them. Gently detach the stems without breaking the caps.
  4. Line a wire strainer with a paper towel and place it over a small saucepan. Lift the porcini from their soak, but do not discard the liquid. Pour the liquid into the strainer, filtering it through the paper towel into the saucepan. Rinse the reconstituted porcini in several changes of cold water, making sure no grit remains attached to them. Add them to the saucepan and cook, uncovered, over lively heat until all the liquid has boiled away.
  5. Preheat oven to 400 degrees.
  6. Chop the cooked reconstituted porcini, the fresh mushroom stems, the pancetta, and anchovy fillets all very fine. It can be done by hand or in a food processor.
  7. Put all the above chopped ingredients in a mixing bowl, adding the basil leaves and chopped garlic. take the milk-soaked crumb into your hand, squeeze it gently until lit stops dripping, and add it to the bowl. Break the egg into the bowl. Add the parsley, marjoram, salt, and several grindings of pepper, and thoroughly mix all the ingredients in the bowl with a fork until they are combined into a smooth, homogeneous mixture.
  8. Stuff the mushroom caps with the mixture from the bowl. Put enough stuffing into each cap to make a rounded mound. Sprinkle the mounds with bread crumbs.
  9. Choose a baking dish that will accommodate all the mushroom caps side by side in a single layer. Smear the bottom and sides of the dish with a little of the olive oil. Put the mushrooms in the dish, stuffed sides facing up. Crisscross the mushrooms with a thin stream of olive oil, lightly daubing the stuffing.
  10. Place the dish in the uppermost level of the preheated oven and bake for 30 minutes, or until the mounds of stuffing have formed a light crust. After removing from the oven, allow them to settle for several minutes before serving.

Buon appetito!

Sarah Ferstel


Oh, dear readers!

Today, I welcome my buddy and former roomie, Brett Chiquet, as a contributor to this glorious blog. Brett and I met in college and briefly shared a small bungalow (that's Natchitoches speak for hovel).

The house was truly ridiculous. First, the refrigerator it came with didn't really work. So, we had the landlord remove it, and we replaced it with our 2 dorm fridges. Really, we did that. Also, the only A/C window unit was in my room, but the heating unit was in Brett's. In the winter, I slept in my sleeping bag under the covers. But rent was $200/month for each of us, and we had our (platonic) love to keep us warm.

It wasn't all bad. The landlord let us paint our rooms (I went for Kermit green, Brett went for a more subdued hue of beige), and I even painted a sky with clouds on the ceiling in the hallway. There was also a tire swing on the oak tree in the front yard. It was a sweet little shack.

Of all our great times in that house, two of the best involved food.

For my 21st birthday, Brett and I made a Kahlua infused cake. I was mildly disappointed when the cashier at Albertson's didn't ask to see my ID when we went to purchase the Kahlua (ah, Louisiana). The cake was ridiculously good, if you like pudding and Kahlua. I don't remember the recipe except that once it was baked, we poked holes in it and poured the Kahlua into the holes. The flavor was - intense.

For our housewarming party (is that right, Brett?), we threw together a pasta dish that I still make to this day. The following recipe is off the top of my head, and, because this is a simple dish that is made in one pan and one pot, you can add/drop ingredients as you see fit.


Sun-dried tomato Alfredo crawfish pasta Extravaganza!

Ingredients:

  • 1 package (1 lb) frozen crawfish tails (of course, you can substitute fresh crawfish). Defrost before beginning. Please buy Louisiana crawfish and support our local economy. Chinese crawfish make baby Moses cry in his etoufee.
  • 1 jar of Classico Sun-dried Tomato Alfredo sauce
  • 1 onion, diced
  • 3 cloves of garlic, sliced or minced depending on how you like it
  • 1 yellow bell pepper, diced or in slices
  • 1 red bell pepper, diced or in slices
  • any other veggies/spices you'd like to add
  • extra virgin olive oil (EVOO for those of you too lazy to say 8 syllables)
  • 1 package of spaghetti or linguine
  • Tony Chachere's Creole seasoning
Supplies:

  • Big pot
  • Big pan
  • Big serving dish/bowl
  • Wooden spoon

Before we begin, you should all be aware that I'm not giving precise cooking instructions here. Hopefully, you're already pretty comfortable in the kitchen.

Instructions:

In a big pot of boiling water*, cook the pasta until al dente (which means something like "to the tooth" in Italian, but, for our purposes, means the pasta is still chewy); if the box says 'cook for 7-8 minutes', then cook for 7, etc. When the pasta is done, strain the water and toss the pasta in the serving bowl with a little olive oil to keep if from getting sticky.

*Putting olive oil in the water pot is useless according to Marcella Hazan, the Italian goddess of cooking.

In a big pan, heat about 3 tablespoons of olive oil on med-high heat (adjust as you see fit) and toss in the onions until transparenty golden, or about 5 minutes. Stir.

Add bell peppers to pan and cook until tender. Stir.

Now toss in the garlic and defrosted crawfish tails and cook until the crawfish are hot (this means you need to taste while cooking). Stir.

Hey! Did you take the pasta off the stove? You didn't? Gross, give that mess to the dog and start again.

Continuing with the recipe - Okay, crack open that jar of sauce and dump it in the pan. Stir until it's all warm and ready for consumption. Add Tony's to taste.

Pour contents of pan onto pasta in giant bowl. Stir and enjoy!

OR plate plain pasta separately and spoon saucy crawfish-y goodness onto individual servings.

OR add pasta to pan and stir the whole thing all together and then serve.


Bon appetit!

If you make this, please let us know in the comments how it turned out.