Showing posts with label easy. Show all posts
Shelly
The lack of activity on this blog, in no way, coincides with a lack of activity in my kitchen. Seeing as how we all have to eat, I imagine that it's the same for all of you. . . unless everyone in the world has suddenly converted to fast food junkies, which, knowing all of you, seems highly doubtful. Often, I am too lazy to dig out my camera, or things get too messy to even imagine taking a photo. (After all, who wants to take a picture when their hands are covered with raw chicken germs?) Regardless, from time to time, there does come a peaceful, germ free moment in the kitchen when you may pause and ask yourself, why am I not taking a picture of this dish? It looks so beautiful. I went to so much trouble to get to this point, etc. So, I am encouraging you. . . go forth and multiply. . . or, umm, go forth and photograph? I'm trying to make myself cook new recipes every week, and I need ideas! Especially tried and true ideas.

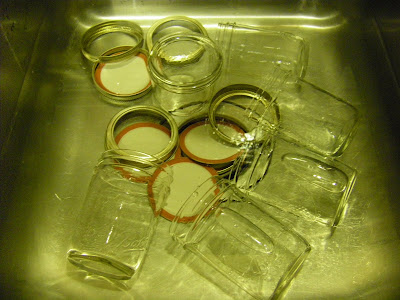
Now, in order to avoid being a hypocrite, I'm posting some photos from last night's salsa endeavor. Before I begin with the recipe, I want to make a special note that when preserving food, you should be cautious, make sure that everything is sterile, and all of that jazz. . . So, start with some clean jars!

And here's the recipe:

2 c. tomatoes (chopped)
1 c. onions (chopped)
1/2 c. bell pepper (chopped)
1/2 c. or more jalepenos (chopped) *
4 cloves of garlic (chopped finely)
a bunch of fresh corriander or about 1 T. dried corriander
1/2 T. salt
1 tsp. white pepper
1/4 c. sugar
1/3 c. lemon juice

Combine all ingredients in a pot, and cook on medium high heat until the mixture starts to boil. Lower the heat to medium and continue to simmer for 25 minutes. Spoon into jars, leaving about 1/2 inch unfilled at the top of the jar. Being certain to wipe the jars and rims clean, close the jars, and place in boiling water for twenty more minutes. Carefully remove from the water, and allow to cool. More importantly, be sure to follow any manufacturer's directions regarding the sealing of your jars! Safety first.

* I used 1/2 c. of jalepenos and wished that I had used much more. The recipe, as is, is mild at best. If you want to make salsa to give out as gifts, to people who might not like spicy food, this recipe is pretty ideal, but if you're making it for yourself, and you like it hot. . . definitely add more!

Shelly
Okay. . . I'll admit it. I don't cook as much as I should or would like to. . . but right now, at this exact moment, I actually have an excuse. My new kitchen is an absolute wreck (see image at left). This photo is actually from moving day one. I can not tell you how much more disastrous it looks at this point, after a week or so of moving things in and trying to find a happy home for everything in a kitchen which has surprisingly much less drawer space than the old apartment did.

Also of note, I am now having to become accustomed to cooking on a dreaded ELECTRIC stove. Who ever thought of electric stoves? Can anything really replace an open flame underneath your pot?

That being said, I have made my first attempt at cooking something in the house other than microwave lasagna or ham sandwiches. It was, of course, a classic. . . Sauce Piquante. There are, sadly, no pictures of the food - because who knows where the camera is now? It's probably buried under the lawnmower in the middle of the living room floor. . .

Anyhow, here's my recipe for Sauce Piquante, passed down from mom. She adds sausage to hers now, but I left that out since I am no huge fan of sausage. I've seen other recipes that are much more complicated. . . but why bother when this is so good and so simple?

Sauce Piquante
2 lbs. beef stew meat
2 cans Rotel
1/2 onion, diced
1 T. Vegetable oil
1 small (8 oz? 6 oz?) can of tomato sauce

Heat the vegetable oil (or butter if you've stupidly left the oil at the old apartment) and toss in the onion. Sauté the onion until it starts to wilt. . . turns translucent. That's it. Then, toss in the stew meat, and I always sprinkle some Tony Chachere's on it, but not too much, otherwise it'll all be too salty. Brown the meat, then lower the fire (or pretend fire if you have an electric stove) to low. Add the Rotel, and tomato sauce and mix well. Cover the pot and let it simmer for about two hours. Spoon over rice.

This is one of my comfort foods, and always reminds me of home. It's also one of the few dishes that my dad cooked when I was growing up. . . Sauce Piquante, roast, brisket, and bbq. I guess it has enough meat in it to count as man food.
Stacie the Baker
Hello world!

It is with great joy and honor that I present to you my very first post on Sarah, Shelly and Brett's illustrious cooking blog. I enter this format with much trepidation, so please do not pulverize me in the comments section (or I'm afraid my ego will never let me come back). However, needless to say, I'm pleased to bring you a scrumptuous, little recipe for caramel corn!

To be totally honest, I'm kind of bummed this is my first post. I was hoping for something a little more culinarily challenging, but when you've procrastinated past the point of apologies, this is what you're reduced to. So, CARAMEL CORN it is!


Ingredients
12 cups of popped corn
1 cup of roasted pecans
1 cup of M&Ms (optional)
1 stick of unsalted butter
1 cup of packed light brown sugar
1/4 cup of light corn syrup
1/2 tsp. salt
1/2 tsp. baking soda
1 large brown paper grocery bag


I'd like to preface the instructions by stating you can use whatever kind of popcorn you'd like. Precooked popcorn, microwave popcorn, stovetop cooked popcorn. I personally cooked my corn on the stovetop in oil (cheapest!).

Instructions
1) Place popcorn and roasted nuts in brown paper grocery bag. Shake it up a little to combine (If you'd like, you can add pretzels too!)

2) Melt butter in microwave for approximately 1 minute. Add brown sugar, corn syrup, and salt and microwave for 2 minutes. Stir the mixture for about 30 seconds to a minute, and then placed back in the microwave for 2 more minutes. The mixture will bubble and boil. Do not be alarmed!

3) Add baking soda to sugar mixture. It was get foamy, but once it starts to do this... carefully pour it on top of the caramel corn. Fold over the paper bag and start to shake!

4) Throw it back in the microwave for another minute. Take it out and shake again. Then another minute in the microwave. Open the bag, add the M&Ms and shake for 30 seconds one last time!


Voila! Just spread it over a cookie sheet and let it get crunchy! You can break it up and start munching on it within 5 minutes.

Here's an idea: For an inexpensive Christmas gift, I put mine in Christmas-themed Chinese take-out boxes. Good for coworkers or neighbors!


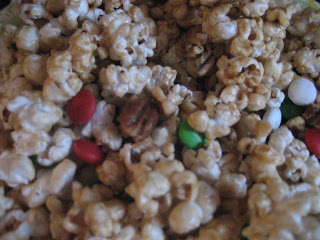
Either way, this is such an easy snack to make... I hope that you enjoy!
Shelly
When Sarah came to visit this past weekend, we were talking about food (of course), and it came up that we had both made quiche last week. I wonder if the beginning of Autumn triggers some subversive quiche cravings in the modern mind. Regardless, I promised to post something about the wonderful conjoining of pie crust, egg and cheese. A week later, after a diagnosis of possible mono, I'm finally getting around to it. Because it's so tedious to sit down and write about eggs, right?

So, my quiche story is quite recent. It was never something that I had growing up. It's funny to discover these foods and wonder how on earth you've missed them for so long. . . . especially something like this. It seems like quiche (well some of them) would have been perfect on fridays during Lent. Goodness knows that I wouldn't have complained if we ditched the tuna salad sandwiches from time to time. Alas, it took going away to college for me to discover this, apparently German, culinary delight which has been popular in America since the 1950s (aka long before I was around). http://www.foodreference.com/html/artquiche.html

I can't say that I remember the first time that I ate quiche, but I do have fond memories of the first time that I cooked quiche. One of the grocery stores in town decided to stock feta - which doesn't seem like a bad idea at all. However, the population of Natchitoches, Louisiana, apparently didn't feel a need for feta at the grocer's. . . which left them in a real pickle. To clear the shelves, God bless them, they marked down all of the feta to 50 cents a package. Being an impoverished college student, I decided to purchase an unseemly amount of cheese. The lid of the feta container included a recipe for quiche - which seemed too easy to be true. Now, I had a ton of feta, a recipe for quiche, and eggs are super cheap. . . so we hauled out Crissy's copy of Where's Mom Now that I Need Her? http://www.amazon.com/Wheres-Mom-Now-That-Need/dp/0961539011/ref=sr_1_1?ie=UTF8&s=books&qid=1253802089&sr=8-1 (a book that every graduating senior should get as a gift) and found an even easier recipe and got to cooking. The feta stayed that cheap for months, and we ate an excessive amount of quiche that semester.

I'm not going to tell you that I don't like quiche with all kinds of fun meat and veggies in it. I was even looking at a recipe recently for a Spanish version of some sort with potatoes and will probably try it soon. However, when I think of quiche, I think of this very simple method of combining those few main ingredients which create cheesey, eggy perfection. I never use a recipe anymore, so this recipe is going to sound like one of those annoying recipes that you get from old people who have been cooking their whole lives and are just guessing at measurements. Fortunately, eggs are cheap, so if you screw this up (and how could you really?) just pawn it off on some unsuspecting and hungry person and start another, tweaking things to your taste.

Quiche
1 frozen pie crust (I prefer the deep dish crusts)
6-8 eggs
1 pkg. feta cheese
1/2 c. cream (or whole milk)
salt and pepper to taste

Simple as pie. . . preheat the oven to 350. Scramble the eggs in a large mixing bowl. Add the cream, salt and pepper. Sprinkle the cheese on the bottom of the pie crust. Pour the egg mixture on top, and bake until done. I think that this usually takes 30-45 minutes in the oven, but you'll really just need to keep an eye on it. The top will start to turn a light golden. That's when you'll want to take it out. And voila!
Sarah Ferstel


Oh, dear readers!

Today, I welcome my buddy and former roomie, Brett Chiquet, as a contributor to this glorious blog. Brett and I met in college and briefly shared a small bungalow (that's Natchitoches speak for hovel).

The house was truly ridiculous. First, the refrigerator it came with didn't really work. So, we had the landlord remove it, and we replaced it with our 2 dorm fridges. Really, we did that. Also, the only A/C window unit was in my room, but the heating unit was in Brett's. In the winter, I slept in my sleeping bag under the covers. But rent was $200/month for each of us, and we had our (platonic) love to keep us warm.

It wasn't all bad. The landlord let us paint our rooms (I went for Kermit green, Brett went for a more subdued hue of beige), and I even painted a sky with clouds on the ceiling in the hallway. There was also a tire swing on the oak tree in the front yard. It was a sweet little shack.

Of all our great times in that house, two of the best involved food.

For my 21st birthday, Brett and I made a Kahlua infused cake. I was mildly disappointed when the cashier at Albertson's didn't ask to see my ID when we went to purchase the Kahlua (ah, Louisiana). The cake was ridiculously good, if you like pudding and Kahlua. I don't remember the recipe except that once it was baked, we poked holes in it and poured the Kahlua into the holes. The flavor was - intense.

For our housewarming party (is that right, Brett?), we threw together a pasta dish that I still make to this day. The following recipe is off the top of my head, and, because this is a simple dish that is made in one pan and one pot, you can add/drop ingredients as you see fit.


Sun-dried tomato Alfredo crawfish pasta Extravaganza!

Ingredients:

  • 1 package (1 lb) frozen crawfish tails (of course, you can substitute fresh crawfish). Defrost before beginning. Please buy Louisiana crawfish and support our local economy. Chinese crawfish make baby Moses cry in his etoufee.
  • 1 jar of Classico Sun-dried Tomato Alfredo sauce
  • 1 onion, diced
  • 3 cloves of garlic, sliced or minced depending on how you like it
  • 1 yellow bell pepper, diced or in slices
  • 1 red bell pepper, diced or in slices
  • any other veggies/spices you'd like to add
  • extra virgin olive oil (EVOO for those of you too lazy to say 8 syllables)
  • 1 package of spaghetti or linguine
  • Tony Chachere's Creole seasoning
Supplies:

  • Big pot
  • Big pan
  • Big serving dish/bowl
  • Wooden spoon

Before we begin, you should all be aware that I'm not giving precise cooking instructions here. Hopefully, you're already pretty comfortable in the kitchen.

Instructions:

In a big pot of boiling water*, cook the pasta until al dente (which means something like "to the tooth" in Italian, but, for our purposes, means the pasta is still chewy); if the box says 'cook for 7-8 minutes', then cook for 7, etc. When the pasta is done, strain the water and toss the pasta in the serving bowl with a little olive oil to keep if from getting sticky.

*Putting olive oil in the water pot is useless according to Marcella Hazan, the Italian goddess of cooking.

In a big pan, heat about 3 tablespoons of olive oil on med-high heat (adjust as you see fit) and toss in the onions until transparenty golden, or about 5 minutes. Stir.

Add bell peppers to pan and cook until tender. Stir.

Now toss in the garlic and defrosted crawfish tails and cook until the crawfish are hot (this means you need to taste while cooking). Stir.

Hey! Did you take the pasta off the stove? You didn't? Gross, give that mess to the dog and start again.

Continuing with the recipe - Okay, crack open that jar of sauce and dump it in the pan. Stir until it's all warm and ready for consumption. Add Tony's to taste.

Pour contents of pan onto pasta in giant bowl. Stir and enjoy!

OR plate plain pasta separately and spoon saucy crawfish-y goodness onto individual servings.

OR add pasta to pan and stir the whole thing all together and then serve.


Bon appetit!

If you make this, please let us know in the comments how it turned out.