Showing posts with label recipe. Show all posts
Stacie the Baker
Hello world!

It is with great joy and honor that I present to you my very first post on Sarah, Shelly and Brett's illustrious cooking blog. I enter this format with much trepidation, so please do not pulverize me in the comments section (or I'm afraid my ego will never let me come back). However, needless to say, I'm pleased to bring you a scrumptuous, little recipe for caramel corn!

To be totally honest, I'm kind of bummed this is my first post. I was hoping for something a little more culinarily challenging, but when you've procrastinated past the point of apologies, this is what you're reduced to. So, CARAMEL CORN it is!
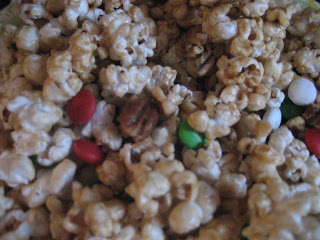


Ingredients
12 cups of popped corn
1 cup of roasted pecans
1 cup of M&Ms (optional)
1 stick of unsalted butter
1 cup of packed light brown sugar
1/4 cup of light corn syrup
1/2 tsp. salt
1/2 tsp. baking soda
1 large brown paper grocery bag


I'd like to preface the instructions by stating you can use whatever kind of popcorn you'd like. Precooked popcorn, microwave popcorn, stovetop cooked popcorn. I personally cooked my corn on the stovetop in oil (cheapest!).

Instructions
1) Place popcorn and roasted nuts in brown paper grocery bag. Shake it up a little to combine (If you'd like, you can add pretzels too!)

2) Melt butter in microwave for approximately 1 minute. Add brown sugar, corn syrup, and salt and microwave for 2 minutes. Stir the mixture for about 30 seconds to a minute, and then placed back in the microwave for 2 more minutes. The mixture will bubble and boil. Do not be alarmed!

3) Add baking soda to sugar mixture. It was get foamy, but once it starts to do this... carefully pour it on top of the caramel corn. Fold over the paper bag and start to shake!

4) Throw it back in the microwave for another minute. Take it out and shake again. Then another minute in the microwave. Open the bag, add the M&Ms and shake for 30 seconds one last time!


Voila! Just spread it over a cookie sheet and let it get crunchy! You can break it up and start munching on it within 5 minutes.

Here's an idea: For an inexpensive Christmas gift, I put mine in Christmas-themed Chinese take-out boxes. Good for coworkers or neighbors!


Either way, this is such an easy snack to make... I hope that you enjoy!
Sarah Ferstel
In the two weeks since my last blog, I've been a busy little baker bee as I continue testing out cupcake recipes to be used at my friend's wedding. Not only did I try out a second recipe for the lemon cupcakes, but I also managed to create some very ugly swamp cupcakes, and I made some beautiful Devil's food cupcakes with blue cream cheese icing. My coworkers have been very grateful and eager guinea pigs, but I do feel the tiniest bit of guilt about edging them towards diabetic shock on a weekly basis. Oh, well.

For my second try with lemon cupcakes, I used bellaluna221's recipe found here. I preferred the lighter taste and texture of these cupcakes in comparison to the first batch I made, but my friends and coworkers disagreed. They really liked the first recipe's rich texture and lemony taste. The people have spoken and I guess I should follow mob rule.

Shelly was kind enough to come over and help me with these lemon cupcakes. She also took lots of pictures documenting my experiments in decoration. In the picture to the left, you can see that the cupcakes at the top of the photo have been sprayed with edible pearl luster and then topped with various candy or zest decorations. The cupcakes at the bottom have only been sprinkled with edible glitter dust mixed with powdered sugar. It's difficult to see the glitter in photos, but in person they are very pretty.

After my great success with the lemon cupcakes, I moved on to the "Blue velvet cupcakes." The idea was to use the recipe for red velvet cupcakes, but use blue food dye instead of red. I warned the bride that the blue might not mix very well with the cocoa, but I told her I'd give it the old (post) college try. When I saw the color of the batter, I laughed out loud. The final baked cupcakes weren't much better, but they really taste great - very moist and delicious - you just have to get past the fact that they look like moldy, green rocks.


There's no way in heck I was actually going to share these at work, so I saved a few to scare my friends and threw the rest away. I can't have people associating my baking with swampy cupcakes.

Moving past the "blue velvet" disaster, I decided it was time to try out the Devil's food cake recipe I have. These came out perfectly rich and delicious. I topped them off with pretty blue cream cheese frosting and sprinkles.


I used a variety of toppings including non-pareils, sugar crystals, and the sparkle dust (which didn't show up against the blue very well).

I'm making the lemon cupcakes by request for my father's 60th birthday (!), and then I'll make the devil's food cake cupcakes with mocha icing. Once the wedding is over, and my cupcake journey comes to its end, I think I'll take a long and well-deserved break from the world of cupcakes.

Maybe I'll start experimenting with beef.
Shelly
When it comes down to it, you can group recipes into a very few amount of categories. There are the recipes that you keep telling yourself that you're going to try. There are recipes that you look at and think that you would never take the time to make or would never want to eat. There are the recipes that you've tried once or twice and remember fondly. . . and there are the recipes that you absolutely can not live without. This is one of those recipes that I absolutely can not live without. . . not because it blew my mind the first time that I made it. . . just because it's good. It's real food, the kind of food that my mom would have made when I was growing up - if she had cooked more, and if my dad would have been willing to eat stew.

The recipe actually comes from a cookbook that my elementary school compiled when I was in third grade, courtesy of Mrs. Norma Nix. (Her son was a year above me and a real jerk - which did not keep Maria from having a huge crush on him in high school.) I never got around to making it, though, until a few years ago. . . when I was going through this phase of romanticising life on the prairie and wishing that I had been a pioneer. . . spending long days outside and evenings in a flannel nightgown by the fire. . . with a garden out back, a cold cellar, and thirteen children running around barefoot and dirty with the puppy dogs in the back yard.

Chuck Wagon Stew
1 tsp. sugar
1/4 c. flour
2 lb. cubed beef
2 Tbsp. shortening
2 tsp. salt
1/4 tsp. pepper
1 tsp. chili powder
1 bay leaf
2 tomatoes, peeled and quartered
1 (10.5 oz.) can beef broth
6 small potatoes
6 small carrots
6 small onions
3 or 4 stalks celery (I never use this because celery is gross)
1 c. frozen peas (And I have never once remembered to buy peas, so this always gets omitted too)

Combine sugar and flour. Coat beef and brown in shortening. Add seasonings, tomatoes, and broth to meat. Cover and simmer 1 to 1 1/2 hours or until tender. Stir in vegetables, omitting the peas. Cover and cook about 30 minutes. Add peas. Cover and cook about 15 minutes.

Aside from the time that it takes to cook, this is a really EASY recipe - translation, you don't have to chop the veggies which equals awesome in my book. Ha. I'm such a lazy cook.
Shelly
Any good food blog should begin with a favorite recipe from your grandmother!


Of course, this wasn't my original intention. Originally, I was going to go on about the time that Sarah and I made pain au chocolat and filled up an entire 1000+ square foot apartment with smoke just because we used the wrong pan.


*Here's a helpful hint. . . be sure to use the right dish for the job. It could make the difference between a happy chocolate filled evening and a smokey chocolate filled evening.*


But, since I couldn't find that recipe in my trusty recipe box (Believe me, you don't want to see what the inside of this looks like.), I decided that I should ramble a bit about my grandma. That's really where the love of food begins, if you think about it. . . or at least where it began for me. I have so many fond memories of sitting around her house in the morning drinking coffee milk and eating Little Debbie snacks for breakfast - both treats that had no place in my mom and dad's house. As an adult, I've spent a good deal of time in antique shops and thrift stores rejoicing when I find a recipe box just like my mom-mom's. . . or that goofy Corning Ware with blue flowers because that's what she has stacked in her cabinets. I'm not even going to go into how expensive those stinking melamine Texas Ware mixing bowls are. It's funny because no matter how many retro pieces of kitchenware I buy, my food never does come out tasting like hers. That being said, as I was going through the recipe box looking for that pain au chocolat recipe, I came across my mom-mom's Pineapple Cake Filling recipe. It's a shame that no one bothers to make good cakes anymore. This has always been one of my favorites and is apparently something that's fairly universal among the older crowd. One of my good friends at the library, Mary, went on and on about how good her Pineapple Cake Filling recipe was one day, and I started to laugh when she was telling me the recipe. It's this exact one that my grandma makes. That being said, if your grandparents are still around, you probably have this one tucked in your recipe box too. . . but, for those of you that have lost the recipe or were never fortunate enough to have it. . . you're in luck. I'm going to copy mom-mom's recipe card word for word, so you don't miss anything!


This is for a 3 layer cake & top. I don't use icing.

Pineapple Cake Filling


1 large can crushed pineapple

1 cup sugar

1/2 stick butter

1 1/2 tbl. cornstarch, disolved in 1/4 cup water, cook until mixture starts to boil & thicken. Cool before using. If you have too much, you just eat the rest. It's good.


She also included the recipe for Coconut Filling even though she knows that I hate coconut. Nice, yeah? So, you get an extra recipe just because. . .


Coconut Filling for 1 Cake


3/4 cup sugar

1 tbl. corn starch . level spoon

1 cup can milk

1 egg yoke cook until thicken add 1 teaspoon flavor & coconut. I don't measure the coconut. Add what you like.


And that's that. To be fair, my grandma's not really a poor speller. . . Did I mention that she was cajun and that French is her first language? And she's pretty old and senile. . . ha ha ha. . . but I love her.
Sarah Ferstel

Bossy Italian flatmates who taught me about basil and tanning.

In order to complete my food blog trifecta (and so begin world domination!), I have invited my friend, Shelly, to join our little corner of the culinary universe. Shelly, who is not in that picture above, is another dear friend from college and she is a fantastic cook. She is also a patient friend as evidenced by our numerous attempts to cook together. These get-togethers usually involve Shelly politely, if not sternly, shooing me away while she tries to make something terrifically edible. I'm usually just there to prance around the kitchen and pretend like I know what I'm doing.

One of our most successful, but exhausting, cooking binges involved tackling multiple recipes from Marcella Hazan's "Essentials of Classic Italian Cooking." If you do not own this book, then you are missing out. Marcella has written one of those fantastic cookbooks that you actually enjoy reading from cover to cover. For those of you not initiated into cookbook reading, this may sound odd, but it's actually a very good way to learn about cooking (duh!) and food.

I don't remember all the recipes we prepared that night, but I do remember making Marcella's stuffed mushrooms. I LOVE MUSHROOMS! Sorry, I had to get that out in the open. I hated mushrooms as a child (remember, I was a picky brat), but now my love for mushrooms has grown to such an extent that my (future) children will have to work hard to win that part of my heart. Sometimes, I just put raw mushrooms in a bowl with olive oil, salt, and pepper and eat them like a salad. Hmmm, I wonder if I have any mushrooms in my fridge now? Concentrate, Sarah.

Baked Stuffed Mushroom Caps (the words in italics are me)

6 servings (but I can, and have, eaten them all by myself)

Ingredients:

  • A packet of dried porcini mushrooms (about one ounce) - I've noticed that stores don't have a standard place to shelve these. I've found them in produce, with the 'ethnic' (i.e. Italian) food, or with the spices.
  • 1/4 heaping cup crumb (the fresh, soft, crustless part of bread)
  • 1/4 cup of milk (Use whole milk. Buy the little single servings if you don't want leftovers.)
  • 1 pound of fresh, stuffing (large) mushrooms ♥
  • 1/4 pound pancetta (This is a type of distinctive tasting Italian bacon that I've never added when making this. I'm one of those Jewbies who tries, but does not always succeed in, avoiding the oink.)
  • 4 flat anchovy fillets (Again, I've never added these only because I don't like anchovies, but feel free crack a can open if you wish.)
  • 4 fresh basil leaves, torn by hand into small pieces (Okay, newbie cooks, here's a good moment to point out something that many of us oldbies have already discovered. Fresh basil is 100 million times better, and different, than dried. Yeah, it's expensive, but skip the packaged b.s. and buy the dumb plant. Seriously, I have a million potted basil plants and you need no gardening skills to keep them alive. Also, it may seem weird that Marcella instructs you to 'tear' the leaves, but trust me, and two bossy Italians - see pic at top of post - who told me personally, this is the best way to release the basil's flavor.)
  • A small garlic clove, chopped fine
  • 1 egg
  • 3 tablespoons (fresh) parsley chopped fine
  • 1/8 tsp. dried marjoram, or 1/4 tsp. chopped fresh
  • salt and pepper
  • 1/2 cup dried, bread crumbs
  • 1/3 cup extra virgin olive oil
Instructions verbatim from the book:

  1. Put dried mushrooms in 2 cups lukewarm water and let them soak for at least 30 minutes.
  2. Put the soft crumb and milk together in a small bowl of deep dish and set aside to soak.
  3. Wash the fresh mushrooms rapidly under cold running water, and pat them thoroughly dry with paper towels, taking care not to bruise them. Gently detach the stems without breaking the caps.
  4. Line a wire strainer with a paper towel and place it over a small saucepan. Lift the porcini from their soak, but do not discard the liquid. Pour the liquid into the strainer, filtering it through the paper towel into the saucepan. Rinse the reconstituted porcini in several changes of cold water, making sure no grit remains attached to them. Add them to the saucepan and cook, uncovered, over lively heat until all the liquid has boiled away.
  5. Preheat oven to 400 degrees.
  6. Chop the cooked reconstituted porcini, the fresh mushroom stems, the pancetta, and anchovy fillets all very fine. It can be done by hand or in a food processor.
  7. Put all the above chopped ingredients in a mixing bowl, adding the basil leaves and chopped garlic. take the milk-soaked crumb into your hand, squeeze it gently until lit stops dripping, and add it to the bowl. Break the egg into the bowl. Add the parsley, marjoram, salt, and several grindings of pepper, and thoroughly mix all the ingredients in the bowl with a fork until they are combined into a smooth, homogeneous mixture.
  8. Stuff the mushroom caps with the mixture from the bowl. Put enough stuffing into each cap to make a rounded mound. Sprinkle the mounds with bread crumbs.
  9. Choose a baking dish that will accommodate all the mushroom caps side by side in a single layer. Smear the bottom and sides of the dish with a little of the olive oil. Put the mushrooms in the dish, stuffed sides facing up. Crisscross the mushrooms with a thin stream of olive oil, lightly daubing the stuffing.
  10. Place the dish in the uppermost level of the preheated oven and bake for 30 minutes, or until the mounds of stuffing have formed a light crust. After removing from the oven, allow them to settle for several minutes before serving.

Buon appetito!

Sarah Ferstel


Oh, dear readers!

Today, I welcome my buddy and former roomie, Brett Chiquet, as a contributor to this glorious blog. Brett and I met in college and briefly shared a small bungalow (that's Natchitoches speak for hovel).

The house was truly ridiculous. First, the refrigerator it came with didn't really work. So, we had the landlord remove it, and we replaced it with our 2 dorm fridges. Really, we did that. Also, the only A/C window unit was in my room, but the heating unit was in Brett's. In the winter, I slept in my sleeping bag under the covers. But rent was $200/month for each of us, and we had our (platonic) love to keep us warm.

It wasn't all bad. The landlord let us paint our rooms (I went for Kermit green, Brett went for a more subdued hue of beige), and I even painted a sky with clouds on the ceiling in the hallway. There was also a tire swing on the oak tree in the front yard. It was a sweet little shack.

Of all our great times in that house, two of the best involved food.

For my 21st birthday, Brett and I made a Kahlua infused cake. I was mildly disappointed when the cashier at Albertson's didn't ask to see my ID when we went to purchase the Kahlua (ah, Louisiana). The cake was ridiculously good, if you like pudding and Kahlua. I don't remember the recipe except that once it was baked, we poked holes in it and poured the Kahlua into the holes. The flavor was - intense.

For our housewarming party (is that right, Brett?), we threw together a pasta dish that I still make to this day. The following recipe is off the top of my head, and, because this is a simple dish that is made in one pan and one pot, you can add/drop ingredients as you see fit.


Sun-dried tomato Alfredo crawfish pasta Extravaganza!

Ingredients:

  • 1 package (1 lb) frozen crawfish tails (of course, you can substitute fresh crawfish). Defrost before beginning. Please buy Louisiana crawfish and support our local economy. Chinese crawfish make baby Moses cry in his etoufee.
  • 1 jar of Classico Sun-dried Tomato Alfredo sauce
  • 1 onion, diced
  • 3 cloves of garlic, sliced or minced depending on how you like it
  • 1 yellow bell pepper, diced or in slices
  • 1 red bell pepper, diced or in slices
  • any other veggies/spices you'd like to add
  • extra virgin olive oil (EVOO for those of you too lazy to say 8 syllables)
  • 1 package of spaghetti or linguine
  • Tony Chachere's Creole seasoning
Supplies:

  • Big pot
  • Big pan
  • Big serving dish/bowl
  • Wooden spoon

Before we begin, you should all be aware that I'm not giving precise cooking instructions here. Hopefully, you're already pretty comfortable in the kitchen.

Instructions:

In a big pot of boiling water*, cook the pasta until al dente (which means something like "to the tooth" in Italian, but, for our purposes, means the pasta is still chewy); if the box says 'cook for 7-8 minutes', then cook for 7, etc. When the pasta is done, strain the water and toss the pasta in the serving bowl with a little olive oil to keep if from getting sticky.

*Putting olive oil in the water pot is useless according to Marcella Hazan, the Italian goddess of cooking.

In a big pan, heat about 3 tablespoons of olive oil on med-high heat (adjust as you see fit) and toss in the onions until transparenty golden, or about 5 minutes. Stir.

Add bell peppers to pan and cook until tender. Stir.

Now toss in the garlic and defrosted crawfish tails and cook until the crawfish are hot (this means you need to taste while cooking). Stir.

Hey! Did you take the pasta off the stove? You didn't? Gross, give that mess to the dog and start again.

Continuing with the recipe - Okay, crack open that jar of sauce and dump it in the pan. Stir until it's all warm and ready for consumption. Add Tony's to taste.

Pour contents of pan onto pasta in giant bowl. Stir and enjoy!

OR plate plain pasta separately and spoon saucy crawfish-y goodness onto individual servings.

OR add pasta to pan and stir the whole thing all together and then serve.


Bon appetit!

If you make this, please let us know in the comments how it turned out.

Sarah Ferstel

This past Independence day, I celebrated my freedom by eating hot dogs and various grilled meats with my compatriots. Amongst the smorgasbord of meat, there was a dessert or two and I may have had one or two helpings of each. In particular, I was impressed with my pal Rebecca's holiday themed trifle (see picture above). The recipe for her delicious and adorable trifle is below, but, first, let's do a little Internet research (aka 'Googling') and figure out what the heck a trifle is.

According to Wikipedia, that compendium of ambiguity and misinformation, the first trifle was made in 1376 in a book titled "The good huswife's Jewell." At first, I thought "cool, trifles are old and I like old stuff." Being the good little researcher I am, however, I clicked on the citation which led me to another recipe blog site. The site, What's the recipe Jim, states that the "very first known recipe was published in 1956 in a book called "The good huswife's Jewell." Oh, that's disappointing and not as cool. Apparently, instead of being the dessert of kings of yore (my imagination is boundless), some frumpy housewife messed up a cake and cleverly threw it all in a deep bowl and topped it off with alcohol.

With all due respect to Mr. Jim, the spelling in that title is suspect. So, I dug a little further into my research (meaning: I used Google Scholar) and found Stefan's Florilegium, a neat site dedicated to acquiring Medieval primary sources including a great list of cookbooks. It has a .org domain and so is surely legit, or at least that's what I'm telling myself and you good people. It has actual transcripts from the cookbook in question, which was written in 1596 (yay, still old!).

Here's how a good huswife of merry olde England would have made her trifle:

To make a tarte that is courage to a man or woman


Take twoo Quinces, and twoo or three Burre rootes,

and a potaton, and pare your Potaton, and scrape

your rootes and put them into a quart of wine,

and let them boyle till they bee tender,

& put in an ounce of Dates, and when they be boyled

tender, Drawe them through a strainer, wine and all,

and then put in the yolkes of eight Egges,

and the braynes of three or foure cocke Sparrowes,

and straine them into the other, and a little Rose water,

and seeth them all with suger, Cinamon and Gynger,

and Cloves and mace, and put in a little sweet butter,

and set it upon a chafingdish of coles betweene two

platters, and so let it boyle till it

be something bigge.


Hm, I think I'd leave out the "braynes of three or

foure cocke Sparrowes." Seems like it would take

away from the deliciousness of the other ingredients.


In conclusion (by the way, never end a paper this way), here's what we have learned:

  • Wikipedia "authors" not only write incorrect information, but they can get your hopes up. Jerks.
  • Google Scholar does a better job, but I should probably use the library.
  • Trifles can have alcohol!
  • Women in the 1950s felt a strange desire to add alcohol to family desserts.
  • Medieval women of a certain class were literate, 'good', and made fancy desserts. Sound like my kind of broads.
The following modern recipe for Rebecca's trifle came from Taste of Home.

Ingredients:

  • 1 package (3 ounces) berry blue gelatin
  • 1 package (3 ounces) strawberry gelatin
  • 2 cups boiling water
  • 1 cup cold water
  • 2 cups cold milk
  • 2 packages (3.4 ounces each) instant vanilla pudding mix
  • 1 carton (8 ounces) frozen whipped topping, thawed, divided
  • 1 pint fresh blueberries
  • 1 quart fresh strawberries, quartered
  • 1 prepared angel food cake (8 inches), cut into 1-inch cubes

Directions:

In two small bowls, combine each gelatin flavor with 1 cup boiling water. Stir 1/2 cup cold water into each. Pour each into an ungreased 9-in. square pan. Refrigerate for 1 hour or until set.
In a large bowl, whisk milk and pudding mixes for 2 minutes. Let stand for 2 minutes or until soft-set. Fold in 2 cups whipped topping.
Set aside 1/4 cup blueberries and 1/2 cup strawberries for garnish. Cut the gelatin into 1-in. cubes. In a 3-qt. trifle bowl or serving dish, layer the strawberry gelatin, half of the cake cubes, the remaining blueberries and half of the pudding mixture.
Top with blue gelatin and remaining cake cubes, strawberries and pudding mixture. Garnish with reserved berries and remaining whipped topping. Serve immediately. Yield: 16-20 servings.